There’s something magical about tucking a tiny world inside glass—a fairy garden terrarium lets you do exactly that, transforming small spaces into places where imagination thrives.
Creating a fairy garden terrarium in micro scale matters because even the smallest container becomes an ecosystem, requiring care, planning, and a spark of creativity that brings miniature landscapes to life at home.
If you’ve ever wanted to try your hand at building a fairy garden terrarium, this article delivers all the inspiration, step-by-step rules, and practical details you need to get started and succeed.
Picking a Container and Planning Your Micro Landscape
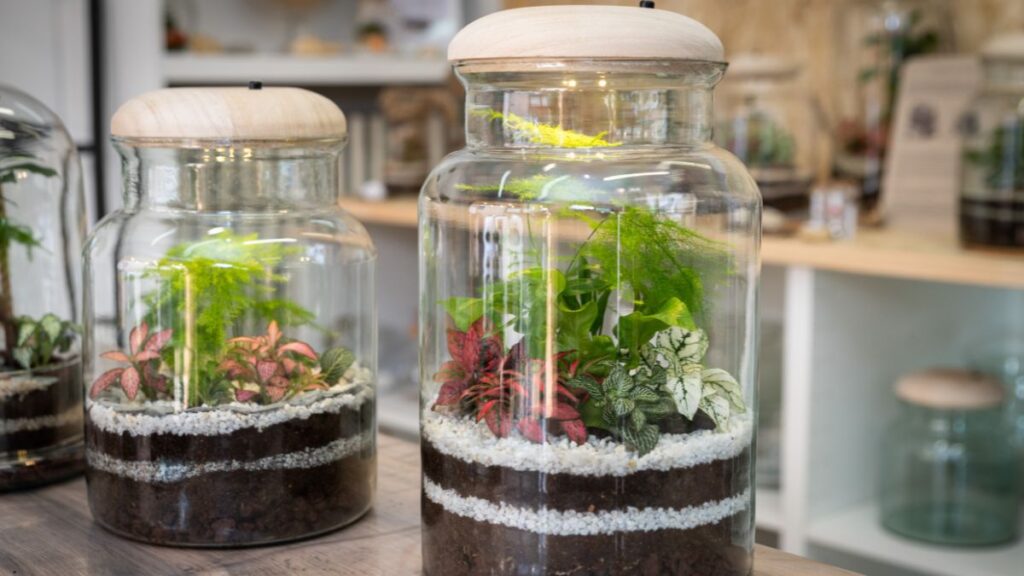
Choosing the right vessel sets the entire mood and structure of your fairy garden terrarium—transparency, size, and shape greatly affect its function. Consider classic jars, novelty glass, bowls, or geometric frames to match your theme and available space.
Plan for layers by visualizing pathways, plant groups, and miniature features. Imagine drawing a tiny map on paper first. Sketching helps balance greenery, walkways, and decorative objects so nothing gets lost or overcrowded in the finished terrarium.
Balancing Container Depth and Plant Growth
Use a vessel deep enough for drainage layers without crowding plant roots. For micro-scale, a jar or bowl four to six inches deep supports both healthy growth and visual detail. Avoid squeezing plants or fairies into shallow dishes where roots can’t settle properly.
If the glass distorts or narrows toward the top, adapt your design. Place taller elements near the center for visibility and stability, just like positioning a tall ornament at the back of a shelf so it doesn’t block the view of smaller items.
Try putting a fingertip over the glass rim as a gauge. Anything taller should remain outside or be replaced with miniatures to maintain scale in your fairy garden terrarium.
Organizing Features Through Zones
Divide the limited ground space into functional or storytelling zones. Direct attention by grouping moss, gravel, or sand in winding paths, then break the monotony with a pond or tiny bench. For fairy garden terrariums, even a pebble can anchor a scene.
Use colored sand, small rocks, or glass pebbles to mark borders—think of them as invisible fences. Place fairy figurines or doors at logical points to hint at hidden stories or unexplored areas, maximizing visual intrigue in your micro world.
Always leave ‘negative space’ open. Crowding every inch reduces realism. Borrow stage-design logic: a bit of emptiness makes focal points and little fairies stand out more distinctly.
| Container Type | Best For | Drainage Fits | Setup Ease |
|---|---|---|---|
| Glass Jam Jar | Micro fairy scenes | Gravel, Sand | Simple |
| Round Fish Bowl | Layered landscapes | Pebble, Charcoal | Moderate |
| Cylinder Vase | Vertical fairy world | Charcoal, Moss | Challenging |
| Geometric Glass | Modern decor | Pebble, Sand | Easy |
| Wide Teacup | Whimsical micro gardens | Fine Sand | Simple |
Building a Stable Living Base and Selecting Healthy Plants
Every fairy garden terrarium thrives when it starts with a structured foundation—drainage layers prevent root rot, charcoal curbs odors, and the right soil blend feeds both mosses and miniature greenery.
Small tropicals, ferns, and mosses survive best in consistently humid micro ecosystems. Each plant should stay under four inches tall when mature, fitting the scale of your fairy garden terrarium perfectly.
Assessing Soil Layers for Micro Terrariums
Layer in fine gravel for drainage, then sprinkle activated charcoal above it. Add a thin quilt of light potting mix. Tuck moss sheets and tiny rooted plants neatly, leaving drainage space untouched at the bottom. This approach helps keep roots dry and healthy long-term.
- Start with clean, sterilized glass; linger odors and pathogens quickly ruin fairy garden terrarium micro-ecosystems.
- Layer one-half inch gravel for drainage to boost aeration and ward off soggy roots in tight space.
- Scatter activated charcoal to trap moisture and prevent the musty soil smell that closed terrariums sometimes develop.
- Pour in quality, light potting mix, never garden dirt, which compacts and grows weeds that overpower micro-plantings.
- Press soil gently—avoid dense packing—so roots of moss and micro ferns expand easily to fill the fairy garden terrarium.
Mixing different mosses creates carpet-like bases, while adding a single miniature fern produces the illusion of a tiny woodland scene. Each mix sets the tone for whimsical, realistic micro-ecosystems.
Maintaining Humidity and Choosing Drought-Smart Plants
Closed glass holds water vapor, making fairy garden terrarium upkeep easier. Add a spritz of water weekly and vent occasionally to prevent fog, fungus, or mildew buildup on your micro-scale foliage and features.
- Pick fit-for-scale mosses—sheet, cushion, or star moss all thrive with high humidity in micro terrariums.
- Use only slow-growing, compact plants so your fairy garden terrarium stays tidy, never overrun or outgrowing its glass vessel.
- Limit succulent use: most prefer drier air and wide-open air—steam harms them in glass worlds customized for fairies.
- Test new plants in a jar overnight before adding permanently—mushy leaves or faded color means try something different.
- Check for hidden pests under leaves, roots, or bark before plantings; tiny bugs can quickly upset the balance and spoil the fairy garden terrarium ecosystem.
Combining slow-growing mosses with a petite polka dot plant or creeping fig adds visual pop and keeps long-term maintenance easy. Your fairy garden terrarium can thus remain both healthy and magical for months on end.
Positioning Fairy Features, Pathways, and Thematic Decor
Arranging your micro-world’s inhabitants and decor should reflect a clear story or scene—this way, every fairy garden terrarium unlocks new discoveries each time you inspect it closely.
Let the container’s shape subtly guide feature placement. In a square glass, flagstone paths naturally curve toward one corner, while in a bowl, a circular walkway feels right, echoing the container’s form and boundary.
Blending Natural and Whimsical Elements
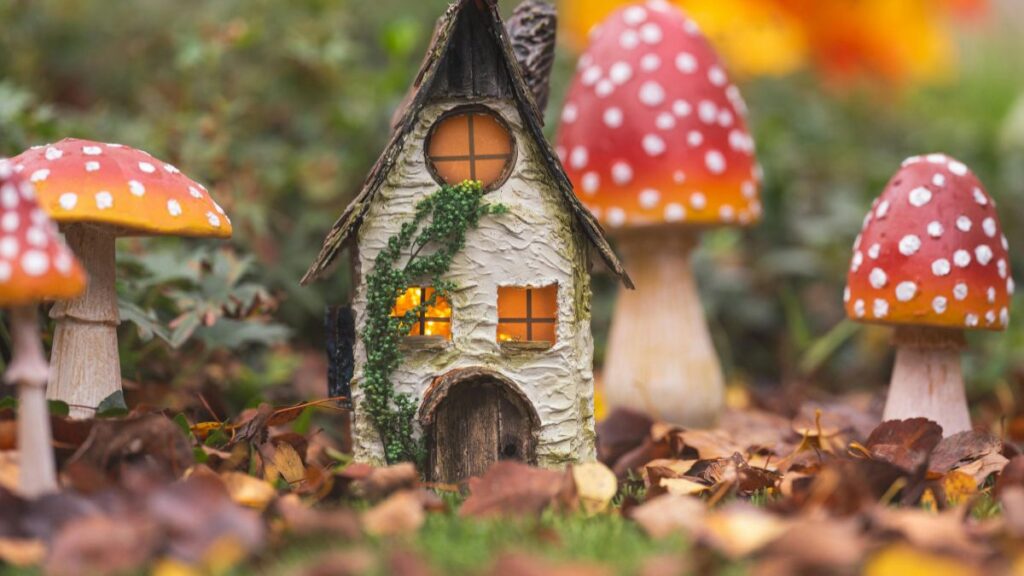
Scatter smooth stones, acorns, or mini toadstool sculptures as scene-setters. Adding a tiny gate or untouched gravel patch brings contrast, as if the fairies tiptoe through untamed parts. Juxtapose living moss against ceramic figurines for a lifelike fantasy feel.
Lay out pathways with flat pebbles, and tuck colored sand into bends for accent. Analogous to laying roads in a tiny town, this makes every route intentional and helps visitors naturally ‘wander’ through your fairy garden terrarium.
Place fairy houses or doors at nestling points under leaves or behind rocks. Each object should evoke the idea: “That’s where fairies enter,” prompting whimsical stories from visitors and owners alike.
Layering Mini Features Without Overcrowding
Add one detail at a time, checking the view from above and at eye level. Too many features muddle the design, diluting magic. Think of jewelry—one statement piece, then subtle accents around it, so the main focus shines.
Test each positioning: set down the object, walk away, return five minutes later, and look with fresh eyes. If something feels out of balance, move or remove. Sometimes less in a fairy garden terrarium truly means more character and harmony.
Let each new detail tell a story: for instance, a tiny ladder leans against a stone to suggest fairies climb for adventures, or a scattered leaf hints at recent play in this micro ecosystem.
Lighting, Placement, and Micro Ecosystem Stability
Proper light and stable conditions prevent stress in your fairy garden terrarium—without the right environment, even the healthiest plants and most whimsical scenes suffer.
Position your terrarium near bright, indirect light. Direct sun magnifies heat inside glass, which can scorch moss and fade fairy features. Shelves or window ledges just beyond midday rays work best for micro-ecosystems.
Fine-Tuning Environment with Micro Adjustments
Monitors humidity and temperature shifts by observing condensation on glass; droplets signal high humidity, dryness appears as shrinking or crispy moss. Adjust by opening the lid or misting lightly to restore equilibrium and maintain a balanced environment.
Rotate your fairy garden terrarium once a week so all sides receive equal light exposure. Like turning a slowly roasting marshmallow, this step keeps plant growth symmetrical and prevents one side from sprawling awkwardly or fading out.
If scenes feel washed-out at dusk, place an LED puck light with soft white color nearby—not inside the container—to enhance magical nighttime ambiance without overheating your micro world.
Design Steps for Stable Micro Ecosystems
Test a new placement overnight before committing. If glass fogs or plants sag, tweak location or lighting. Stability wins over novelty for ongoing plant and decor health—observe for several days, then adjust gradually rather than rushing changes.
Airflow prevents fungal spots or mildew but don’t expose your fairy garden terrarium to drafts. Place away from air vents and heaters to keep the internal microclimate steady and inviting for both plants and miniature fairies.
Label each position change date discreetly on the underside or with a removable tag. Tracking minor tweaks helps spot patterns if any micro-issue develops, making long-term care and fine-tuning almost effortless.
Maintaining Beauty and Function in Your Micro Fairy Garden
Consistent, gentle care keeps your fairy garden terrarium thriving, balancing growth and decor over weeks and months.
Weekly tasks include misting leaves, wiping glass, and checking for wilting plants or toppled fairy features. Treat the process as short, mindful rituals—each action preserves the charm built into your micro ecosystem.
Long-Term Upkeep Habits for Micro Terrariums
Trim moss or leaves with nail scissors rather than tearing—snipping keeps growth tidy and prevents damage. Remove fallen decorations or leaves to prevent mold. Adjust fairy fixtures so nothing obstructs pathways or scenery in your fairy garden terrarium.
Refresh colored sand or gravel borders by gently blowing dust from the surface, like dusting the corners of a tiny bookshelf. Swap seasonal accents occasionally (such as pumpkins for fall or tiny garlands for winter) to keep scenes feeling current and lively.
Inspect plant heights monthly. If any greenery outgrows its place, trim back by a third or transplant to a larger vessel. Replace or rearrange figurines as storylines change—imagination is part of the ongoing joy of micro gardening with fairy themes.
Preventing and Addressing Common Problems
Address mold or soggy patches quickly by removing affected material and airing out the vessel. Fungus gnats, should they appear, can be discouraged with food-grade diatomaceous earth dusted on the soil surface or by adjusting humidity practices.
If a fairy garden terrarium develops an odor, gently remove the lid and let fresh air flow for several hours. Replace soiled or compacted soil as needed, always checking roots for damage before repotting plants.
Monitor for shrunken, faded, or yellowing leaves—a signal your system’s balance is off. Adjust care habits, move to a better-lit spot, or reassess watering frequencies to restore vibrant, healthy micro-scale beauty.
Frequently Asked Questions
What plants are best for a fairy garden terrarium micro ecosystem?
Mosses, miniature ferns, baby’s tears, and creeping fig work beautifully. Choose plants that stay under four inches tall and thrive in humid, low-light glass environments for sustained, small-scale health and beauty.
How do I prevent mold in my fairy garden terrarium?
Start clean, use fine gravel and charcoal for drainage, vent your container weekly, and remove any fallen organic material promptly. Good air circulation and careful watering stop mold from developing inside your micro ecosystem.
Can I use fake fairies or plastic miniatures in my micro terrarium?
Yes, plastic or resin fairy figures work well and won’t degrade in humid conditions. Place them away from direct water to avoid color fading or accidental tip-overs as you maintain plant health.
How do I water a micro fairy garden terrarium?
Mist gently with a spray bottle once a week, checking soil with a fingertip—moist but not soggy is ideal. Adjust frequency if condensation persists on the glass, vent occasionally to prevent excess humidity.
What’s the best lighting for fairy garden terrariums?
Bright, indirect natural light is best. Avoid direct afternoon sun which can overheat the tiny environment. If natural light isn’t available, use a soft white LED lamp, keeping it several inches above or beside the container.