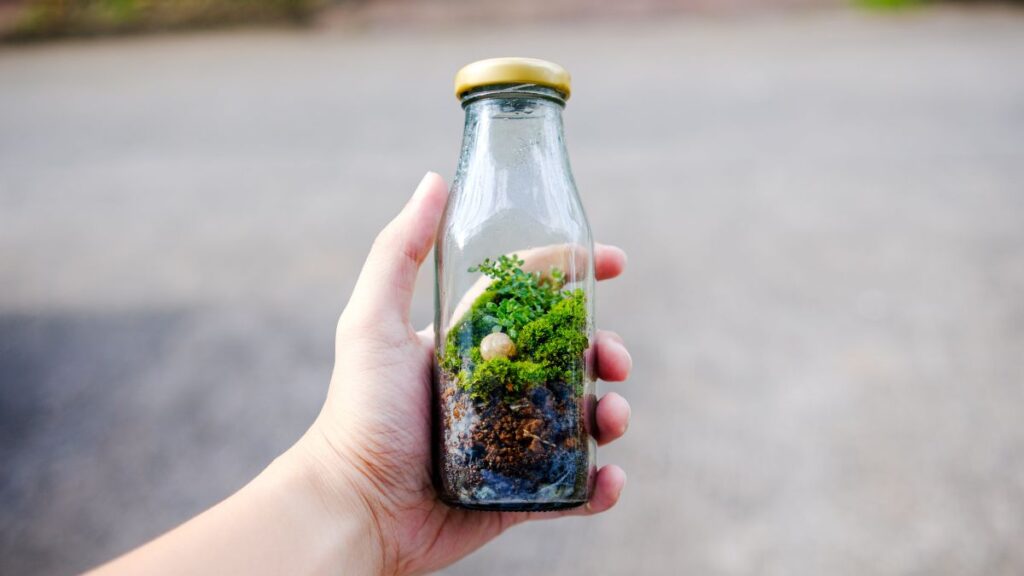
When you spot wilting plants or yellowed moss in your micro terrarium, a sense of “Can I fix this?” lingers. While reviving terrarium ecosystems sounds daunting, real solutions exist for even the most lackluster glass gardens.
Ignoring these warning signs only leads to further decline as every element inside—a leaf, patch of soil, or droplet—matters in a delicate microcosm. Learning how to troubleshoot signals early can help restore your closed or open terrarium to vibrant health.
This guide offers realistic advice for reviving terrarium habitats, even when they look beyond hope. Explore expert strategies, practical steps, and checklists you can use today to breathe life back into your struggling micro ecosystem.
Spotting Early Signs and Taking Swift Action
Every terrarium keeper should recognize early distress cues to prevent collapse. Quick identification leads to faster recovery when reviving terrarium environments—so every observation matters.
Spotting yellowing leaves, shriveled moss, and stunted root growth means timely adjustment is urgent. It’s similar to catching a cold early—acting fast means full recovery is still possible and much less work overall.
Diagnosing Plant Health like a Pro
A drooping fern or brown-edged fittonia isn’t random. Run your finger over wilting leaves and inspect soil moisture with a wooden skewer. Compare your notes against healthy reference pictures—precision matters for reviving terrarium micro-ecosystems.
If new leaves emerge paler, but roots seem healthy, it often points to underfeeding or light deprivation rather than water imbalance. Try this two-step check: gently tug a leaf and sniff the soil for mustiness—it’s your ecosystem’s early alert system.
When tiny leaves feel crisp and the moss crunches under a fingertip, dryness may be a culprit. Moistening with a fine mister brings fast feedback; leaves should perk up within a day, signaling a ready-to-revive system.
Quick Wins: Emergency Fixes for Acute Decline
If your micro terrarium looks like it’s at its end, skip drastic measures. Remove wilted and moldy debris first—use tweezers and discard away from the setup. Then, ventilate for 30 minutes to dispel trapped humidity.
For parched or infested layers, add distilled water to the substrate (not the leaves), and relocate to indirect natural light, never direct sun. This triage calms immediate decline so root systems get a fighting chance.
Don’t waterlog—a soggy micro terrarium quickly tips to rot. Instead, observe leaf response for 24 hours before further action, minimizing shock and improving odds when reviving terrarium plantings.
| Distress Sign | Root Cause | Quick Test | First Response |
|---|---|---|---|
| Yellowing Leaves | Light shortage or fertilizer | Compare new vs. old growth | Increase light/time exposure |
| Mushroom Growth | Overwatering, poor airflow | Check glass for heavy condensation | Open lid to air out, remove fungi |
| Wilting Moss | Low humidity or dry substrate | Moss crunches when touched | Mist substrate, cover to re-hydrate |
| Mold Patches | Stagnant air, decaying matter | Notice white webbing on soil/glass | Remove mold, ventilate container |
| Blackened Roots | Root rot from excess water | Gently pull plant; check for mushy roots | Trim affected roots, replace soil patch |
Adjusting Water Levels and Maintaining Consistency
Fixing improper watering is critical for reviving terrarium life. Adjusting hydration routines—rather than guessing—protects plant health and ensures your micro ecosystem doesn’t tip into rot or drought cycles again.
Use a spray bottle for slow, shallow misting on closed terrariums. For open glass setups, check substrate with a wooden stick before each watering cycle. Letting the soil nearly dry helps moss and roots recover from overwatering stress, a key part of reviving terrarium environments.
Building a Watering Rhythm
Establish a repeating schedule that takes vessel type into account: closed terrariums hold moisture far longer than open ones and may need water just once every two weeks. Test the substrate regularly for a gentle springiness as your indicator for moisture.
- Monitor with a skewer: Insert a wooden skewer to base level; if damp, skip watering to avoid oversaturating roots.
- Use fine misters only: Misting gently helps prevent pooling and makes moisture absorption even—don’t soak the leaves directly.
- Record watering: Mark every hydration day on a sticky note or calendar placed near your terrarium to ensure consistency.
- Observe every 48 hours: After each mist or soak, inspect plants and moss for quick recovery symbols (greener color, perked leaves).
- Correct immediately: If excess water appears at the base, open lids and tilt the terrarium to drain pooled liquid (never siphon by mouth).
Consistency transforms fragile micro-ecosystems into thriving glass gardens and underpins all reviving terrarium plans.
Responding to Humidity Fluctuations
Humidity spikes or dips directly affect recovery chances when reviving terrarium displays. Use a digital hygrometer sticker inside your setup—aim for readings between 60% and 80% for most miniature plants and mosses.
- Ventilate after misting: This avoids trapped humidity leading to mold by propping open lids or sliding doors for 10–30 minutes after each spray.
- Seal when air is dry: During winter or arid spells, keep lids tightly closed so internal humidity remains stable—tiny adjustments make big differences.
- Keep away from forced air: Direct HVAC or heater vents rapidly dry out terrariums, so move your glass garden to sheltered, stable spots in your home.
- Correct surface pooling: If condensation runs in sheets, blot interior glass with a paper towel and reduce watering frequency by half for one cycle.
- Read body language: If moss curls up or roots wander across the surface, mist lightly and watch for quick leaf revival within hours—signals for balancing humidity are visible.
With these micro-adjustments, keeping your micro terrarium’s water and humidity cycles steady makes long-term revitalization a reality.
Refreshing the Soil and Rebuilding Plant Health
Soil refreshes create new beginnings for struggling micro terrariums. When standard interventions don’t revive drooping stems or wilting moss, repotting with fresh substrate renews the environment from roots up—setting every revived plant up for future resilience.
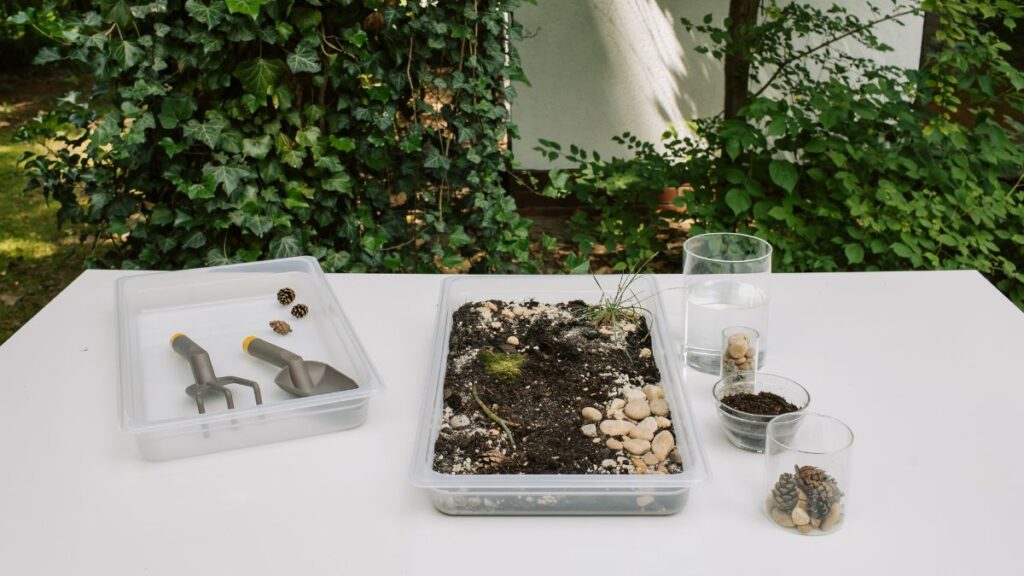
Properly revived soil gives each species just what it needs. Replace old, compacted soil with a fresh, well-draining mix that suits your chosen plants (think peat and perlite for moisture control and aeration).
Practical Substrate Swap Techniques
Start by removing plants with a sterilized spoon and lay them on damp paper towels. Gently separate root clumps—never pull hard, as this tears delicate systems for good. Shake away degraded soil, trim away weak roots, and replant in inches-thick new substrate.
Level the surface so small seedlings don’t lean or collapse, mimicking a stable forest floor. Press down slightly with chopsticks, then mist the substrate, encouraging firm plant contact and speeding up rooting during reviving terrarium phases.
For mosses, set clumps directly atop the new substrate; don’t bury stems. Mist thoroughly, cover, and wait for the green color to return within 24–48 hours—a fast reward for this micro-ecosystem refresh.
Encouraging Strong Root Systems
Root health is the unseen engine of a thriving micro terrarium. When repotting, soak root tips in room-temperature water for fifteen minutes to “wake up” dehydrated or dormant growth points, boosting your reviving terrarium projects.
For plants with blackened roots, trim with sterile scissors. Leave only the firm, pale tips—these are ready for recovery and rapid nutrient uptake, supporting new shoots above the surface in coming weeks.
Monitor regrowth by gently pressing on root crowns after a week. If anchored, rejoice—the soil refresh worked! If wobbly or discolored, revisit lighting or water schedule for improved reviving terrarium odds.
Balancing Light for Faster Recovery
Getting the right balance of light speeds up improvement in micro terrariums. Too little, and weak shading stunts regrowth; too much, and leaf burn delays a full reviving terrarium comeback. Change the lighting setup to boost recovery momentum.
Position your terrarium near a bright window with filtered sunlight; avoid south-facing sills that can cause rapid wilting or moss browning. Test hand shadows: if you can see a distinct shadow but feel no heat, that’s an ideal reviving zone.
Fine-Tuning Exposure for Every Layer
Layering taller stems behind shorter moss creates self-shading, reducing sunburn risk. If leaves curl or fade, pull back from direct rays for several hours per day. Use sheer curtains or white parchment to soften strong sunlight.
Rotate open-topped containers every three days so every side gets even growth. In glass domes, reposition for indirect exposure. Use adjustable LED grow lights at 6–8 inches distance for reliable, year-round support for reviving terrarium micro gardens.
Look for bright green, spreading moss as your indicator—the healthiest color cue that your light balance works for micro-ecosystem revival.
Checklist: Restoring Light Balance During Reviving
- Move to indirect light: Shift terrariums away from hot, direct beams to save sensitive greenery from burn or stress.
- Check for shadow play: Place your hand above the glass. A soft-edged shadow signals optimal, mild illumination for leaf and moss recovery.
- Facilitate even coverage: Rotate containers, especially if your window light is angled, preventing lopsided regrowth or weak shoots.
- Supplement as needed: Dim winter days? Add low-wattage LED lights on a timer to support year-round reviving terrarium processes.
- Watch for green rebound: Once moss and plants deepen in color, the light recipe is working—maintain this routine for stable recovery.
Adapting light methodically turns struggling terrariums into strong, self-regenerating micro-habitats in days or weeks, not months.
Cleaning Glass and Managing Contaminants
Clean, transparent glass is essential for photosynthesis and observation in any reviving terrarium. Streaked or stained panes not only block vital light but also foster mold and algae blooms that threaten recovery.
For weekly care, wipe glass inside and out with a microfiber cloth. Use room-temperature water and avoid household cleaners—these leave invisible residues that harm tiny plant roots and microfauna, undoing weeks of hard-won climax in your micro ecosystem.
Removing Algae, Mold, and Debris
If greenish, slimy areas appear, scrape glass gently with a plastic card or soft brush. Always remove decaying leaves promptly, as they rapidly feed mold during periods of terrarium stress and reviving efforts.
To fight hard water stains, dip a cotton swab in diluted vinegar (10:1 water to vinegar), then rinse thoroughly—this keeps conditions pristine without excessive acidity. Recheck every section for cleanliness after each full rotation on your maintenance list.
Clear glass not only shows off your revived mini world but also ensures light and airflow reach deep substrate layers, benefiting all upward growth.
Conclusion: Revitalizing Your Micro Terrarium with Confidence
Stepwise adjustments make a powerful difference for struggling glass ecosystems. Timely observation, methodical watering, tailored soil refresh, and precise lighting—layered together—can revive a failing micro terrarium.
Maintaining this small universe brings satisfaction and a stronger sense of ecosystem stewardship. As you practice reviving terrarium processes repeatedly, earlier mistakes become valuable lessons, guiding you toward a sustainable, flourishing glass garden.
Take a moment to document your micro terrarium’s journey—from near-collapse to renewal—so you’ll always have proof that patient, specific changes bring your mini sanctuary back to life, no matter how daunting the decline appeared at first.
Frequently Asked Questions
What first signs show my micro terrarium needs reviving?
Yellowing or browning leaves, shrinking moss, or excessive condensation signal the ecosystem is unbalanced. Promptly removing decayed plant material and correcting moisture levels are essential first steps.
How often should I adjust water when reviving terrarium plants?
Closely monitor substrate every other day, rather than following a strict schedule. Only water when the upper inch feels dry, even if it means less frequent attention during reviving phases.
Can I save all plants in a decaying micro terrarium?
Some species may not recover from root rot or advanced fungal problems. Prioritize those showing new shoots or firm roots, replacing non-viable specimens for new growth momentum.
What tools do I need for fast intervention?
Thin tweezers, a fine mister, sterilized scissors, and a wooden skewer provide precise control during debris removal, root trimming, and gentle watering—all important for reviving terrarium environments quickly.
How do I stabilize humidity for moss and plants?
Keep a digital hygrometer inside the container and aim for 60%–80%. Prop open lids briefly after each watering and avoid placement in direct HVAC airflow, maintaining balance during recovery.