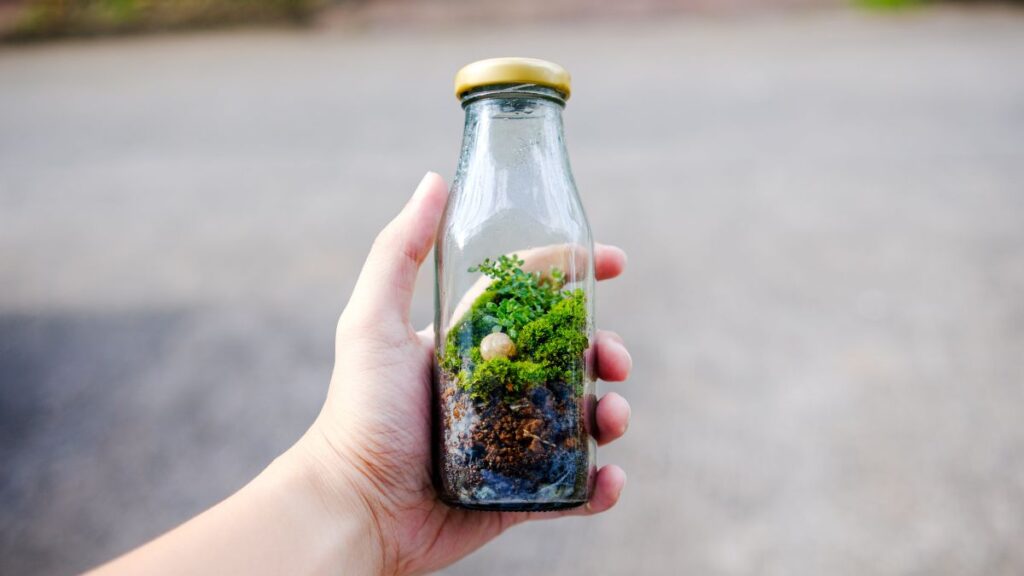
Keeping tiny plant worlds alive can feel impossible when every drop of moisture threatens rot. Micro terrarium enthusiasts know this struggle all too well—rot prevention is a game of balance, vigilance, and subtle moves.
Moisture fuels the vibrant greenery inside micro terrarium ecosystems, but it also brings hidden risks. When humidity and dampness linger, rot prevention tactics shift from optional to absolutely necessary for thriving plant health.
This guide explores practical, step-by-step rot prevention in damp terrarium environments. You’ll see the exact care habits, schedules, and choices that make the difference between struggling plants and a lush, long-lived micro ecosystem.
Managing Water Levels for Long-Term Rot Resistance
Consistently monitoring water input leads to healthier roots and less rot. Instead of waiting for disaster, use clear routines to keep moisture right where your micro terrarium needs it.
Overwatering is the main cause of rot in closed terrarium setups. Adjusting your approach can halt problems before they ruin plant roots or stunt growth, especially in high-humidity conditions.
Spotting the Signs of Overwatered Substrates
Mushy, dark patches in the soil signal danger. Use a clean finger or bamboo stick to check beneath the surface; if the material sticks together and feels cold, adjust your watering schedule right away.
Wilted lower leaves or slimy roots hint at early rot. Peeling leaves back gently helps spot subtle changes—look for unpleasant smells and soft textures as well, which require quick intervention.
Plants like Pellionia or Fittonia curl tightly when roots struggle. Notice if leaf edges brown but the soil remains soaked, a sign of root distress rather than dehydration. Slow watering until normal texture returns.
Measuring Water Inputs for Consistency
Use a graduated syringe or pipette to control exact amounts of water each time. Stick to a set volume, such as 3 to 5 milliliters for a tiny sphere or cube container, which reduces guessing errors.
Log watering in a notebook: “Misted 5ml, soil felt damp but not saturated, no standing water visible.” Comparing notes lets you spot patterns quickly and adjust the frequency to match changes in season or light.
Avoid pouring water directly onto delicate plants. Instead, direct mist or droplets at the soil to prevent leaf surface rot. Schedule reviews every week by checking soil and root condition before any new watering.
| Watering Method | Pros | Cons | Takeaway |
|---|---|---|---|
| Misting | Gentle on plants, easy to control moisture | Can leave water on leaves, risking rot | Use for foliage but not excess on soil |
| Syringe Direct | Precise measure, targets roots | Needs practice for even application | Stick to the same volume each time |
| Soaked Substrate | Good for initial setup only | Hard to dry, often leads to rot | Only use during establishing phase |
| Humidity Tray | Increases air moisture, not substrate | No direct solvent for dry roots | Good for moss, not for most plants |
| Bottom Watering | Prevents foliage soaking, deep moisture | Difficult in micro sizes | Reserve for larger or open vessels |
Perfecting Air Circulation Without Exposing Roots
Adding gentle airflow transforms stagnant, damp terrariums into rot-resistant havens. Position vents or spacers carefully to maintain moisture control while minimizing drafts that dry out tiny plants.
Positioning vent holes high up on the container encourages fresh air exchange. Even if your micro terrarium stays humid, intermittent opening (about 10 minutes, three times per week) keeps bacteria at bay.
Strategic Airflow for Closed Containers
Micro terrariums with tiny lids or corks can trap stale air. Wedge a toothpick under the edge or gently prop the lid open during daylight hours—a small move with a big rot prevention payoff.
- Crack open lids: Prevents condensation pools, which speed up rot on surfaces.
- Fan placement: Place a mini USB fan outside, aiming gentle air past the opening—never directly onto sensitive foliage.
- Change container angle: Tilt the vessel slightly. This reduces trapped condensate beneath the lid and lets warm air escape upwards.
- Move to airier locations: Place micro terrariums near a doorway or open shelf, away from stagnant corners.
- Monitor plant response: If leaves droop slightly but soil remains moist, back off on airflow until normal turgidity returns.
Combining these strategies forms a routine anyone can customize. When airflow and moisture balance out, plants grow stronger, and roots resist decay.
Humidity Management With Living Moss
Moss acts as a living sponge—perfect for rot prevention, if kept trimmed. Place a small patch atop the substrate, trimming when moisture beads stick to the tips but don’t saturate the bottom.
- Spot trim moss: Prevents spongy buildup that harbors fungus and stagnant pockets below the surface.
- Elevate moss on pebbles: Increases airflow beneath, reducing constant wicking and keeping roots dry.
- Observe dew cycles: If moss stays wet all day and night, it’s time to reduce watering or lift the lid briefly.
- Mix moss types: Combine cushion moss for air circulation and sheet moss for surface coverage to find the best moisture balance.
- Avoid crowded growth: If moss overgrows plant stems, clip back to allow light and air up close to the base.
Healthy moss becomes a rot prevention ally, showing exactly when you need to tweak air or water routines before roots suffer irreversible damage.
Developing a Drainage Barrier for Micro Ecosystems
Building in a solid drainage barrier yields micro environments with strong rot prevention foundations. Place a thick layer of washed, inert gravel on the bottom before adding any soil or moss.
This setup acts like an insurance policy, capturing surplus water and protecting root systems even if accidental overwatering occurs.
Layering for Reliable Separation
Start with the largest pebbles or LECA balls—these keep water well below the roots’ typical range. Add a fine mesh between the drainage layer and soil to keep materials separate.
Sometimes, home screens or nylon stockings substitute as the mesh layer. The important part is preventing fine soil particles from clogging the space and impeding quick drainage below.
For super-small containers, even coarse sand can help. Always check for “mushy” lower layers by tipping out the soil occasionally and replacing any material that never fully dries out.
Choosing Soil Mixes That Limit Rot
Well-blended, airy substrate recipes amplify rot prevention for small-scale environments. Use a mix of coco coir, fine orchid bark, and perlite—each component ensures moisture moves freely, even in tight tanks.
Standard potting soil, while common, holds water longer than ideal for micro terrariums. If using it, lighten with extra perlite or coarse sand, especially in closed designs.
Upgrade soil slowly; transition new plants by gently removing old, compacted soil from their roots before nestling them into your prepared blend. This lets roots adapt and reduces stress.
Observing Plant Behavior for Early Warning Signs
Paying close attention to how plants and microfauna react signals pending rot. Rot prevention thrives when you build daily observation into your micro terrarium routine without skipping details or assuming all is well.
Healthy leaves hold their shape and color. Changes in stiffness, color, or posture show that roots may be receiving too much or too little moisture, even if surface soil looks perfect.
Tracking Stem and Leaf Texture
Soft, limp stems tell you that rot may have started below. If you notice sticky exudate or dull, limp leaf edges, act quickly—lower watering and vent lids until rigidity returns.
Unusual darkening or clear spots along stems highlight where rot may have set in. Lift the lid daily and inspect under leaves with a small flashlight for hidden trouble.
In thriving terrariums, stems rest against pebbles or substrate without looking gnarled or translucent. Copy this healthy look by pruning any parts that don’t meet the standard immediately.
Watching Moss and Root Responses
Moss turning yellow or black at the tips signals constant waterlogging. When this appears, space out misting or open the lid longer to encourage gentle drying cycles.
Tiny roots peeking at the surface should be white and crisp. Brown or sticky roots pull away easily from healthy plants. Remove dead or compromised roots with clean tweezers and restart your watering log.
If animals like springtails or isopods cluster on decaying leaves, their activity spikes when rot sets in. Notice these changes and increase inspections for subtle decay below the moss line.
Implementing Microfauna as Natural Sanitation
Smart rot prevention isn’t just about removing water—it’s about creating a living support system in your tiny ecosystem. Beneficial microfauna break down decaying matter and limit rot’s advance naturally.
Springtails and tiny isopods thrive in damp habitats, digesting fungi, dead leaves, and excess organic matter that would otherwise feed rot pathogens below the soil line.
Introducing Springtails Safely
Use a culture from a trusted supplier to introduce springtails gently. Sprinkle them directly onto the moist substrate, where they’ll migrate naturally and form fast-paced cleanup crews.
Always introduce small numbers at first. Watch for surges in their activity; more movement around dying leaves means it’s time to prune and reduce excess moisture until conditions stabilize.
If mold develops after introduction, remove affected parts and monitor fungus levels before reintroducing the microfauna. Patience ensures you establish balanced, rot-resistant populations.
Maintaining the Balance With Isopods
Isopods, like dwarf white or powder blue species, need leaf litter or small bark chunks to feed. Layer these above the substrate to create a self-cleaning, rot prevention boost.
Overpopulated isopod colonies can add excess waste, so scoop out extras if you spot overcrowding. Aim for a handful at most per sandwich-sized container to keep cycles manageable.
Repeat the introduction process every few months if needed. Observe how quickly they break down dead material—the faster they move, the more likely your micro terrarium stays rot-free.
FAQ: Frequently Asked Questions
How much water should I add to a micro terrarium for effective rot prevention?
Use only enough water to keep the soil barely moist—usually just a few milliliters per week. Monitor soil and roots closely, and adjust as seasons or indoor humidity shift.
Which plants resist rot best in micro terrariums?
Peperomia, miniature ferns, Fittonia, and select moss types resist rot when paired with proper substrate and airflow. Always research your specific plant choices and tailor care for their needs.
How do I know if my drainage layer is working properly?
Check beneath the moss or soil every month. If the gravel remains loose and odor-free, with little standing water, your drainage is effective. Replace compacted or muddy substrates promptly.
Why are my moss and leaves turning yellow despite good airflow?
Yellowing can result from overwatering or light issues, not just poor air circulation. Adjust watering amounts and review light exposure—move your terrarium to brighter indirect light if needed.
Can springtails or isopods introduce rot?
Healthy populations help with rot prevention; they rarely cause rot themselves. However, overfeeding or overcrowding these microfauna can lead to waste buildup and encourage fungal issues, so maintain balance and monitor activity closely.