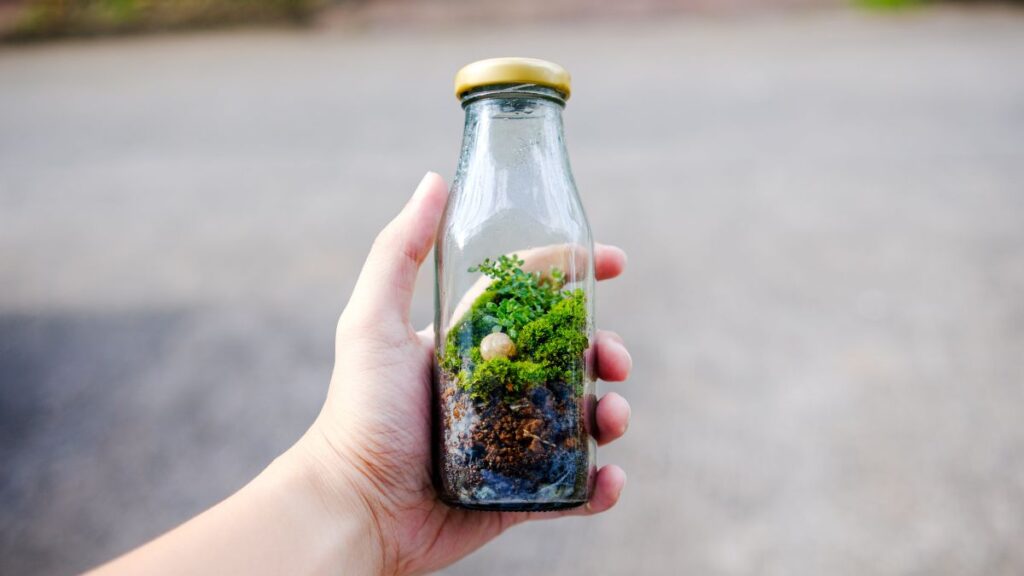
Building a miniature ecosystem on your windowsill feels a little bit magical. You get nature in microcosm—mosses creeping, ferns unfurling, and a balance that just works. Many terrarium lovers look for sustainable designs, and self sustaining terrariums fit that need by adjusting naturally over time.
If you’ve watched your terrarium thrive and then suddenly wither, you’re not alone. These environments are sensitive. Understanding the science behind self sustaining terrariums—from humidity control to pest management—helps you avoid common missteps and keep your slice of green glowing year-round.
Whether you’re prepping your first closed jar ecosystem or rethinking an old glass container, this article shares practical steps to build and maintain self sustaining terrariums. Grab your spray bottle, check your substrate, and dive in to find long-lasting micro terrarium success.
Choosing Compatible Plants and Strategic Layouts Improves Self-Sustainability
Pairing the right plants together in your micro terrarium ecosystem maximizes balance. Focus on species that support each other and won’t compete aggressively for nutrients, light, or space. For self sustaining terrariums, plant compatibility is non-negotiable.
Arrange tall and short plants to create light gradients, prevent overcrowding, and mimic the layered look of natural landscapes. Place shade lovers beneath broad leaves, and always leave airflow gaps near the glass. Avoid cramming as this leads to rot or fungal outbreaks.
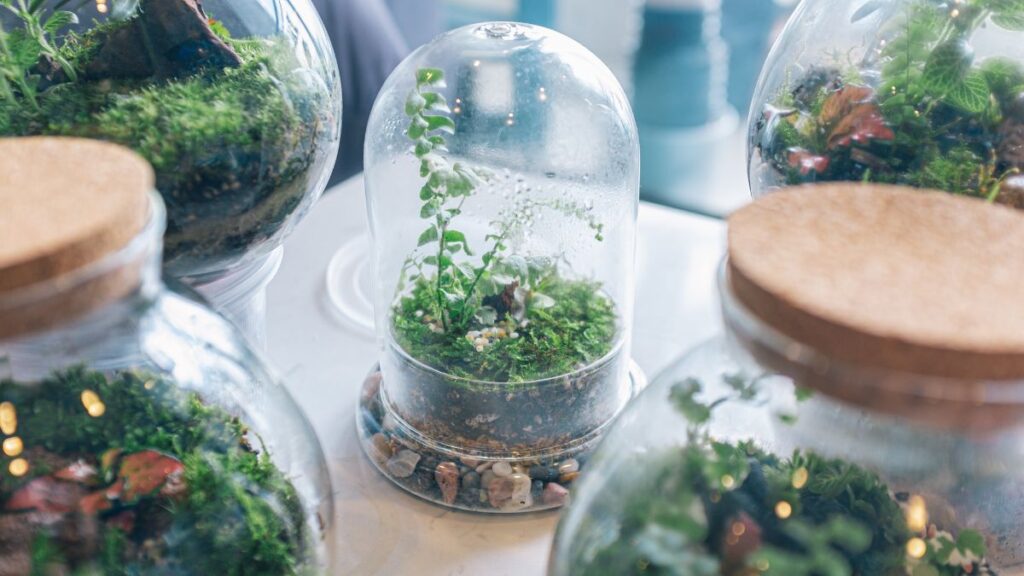
Mini Forest Analogies
Design your terrarium layout like a miniature forest. Position mosses as the undergrowth, ferns as mid-story, and tiny vines as canopy accents. This provides distinct zones just like in nature. Each plant group gets the light and moisture it prefers, reducing stress and disease.
When grouping tiny plants, one realistic example is pairing Fittonia with cushion moss. The fittonia provides cover, while cushion moss absorbs moisture. Try this by saying, “I want the Fittonia in back so the moss stays shaded.” This way, both thrive without direct competition.
Spacing matters. After planting, check that no leaves touch the glass—moisture trapped there invites mold. Keeping 1/2 inch gaps around edges ensures airflow and easy trimming, especially as the plants grow.
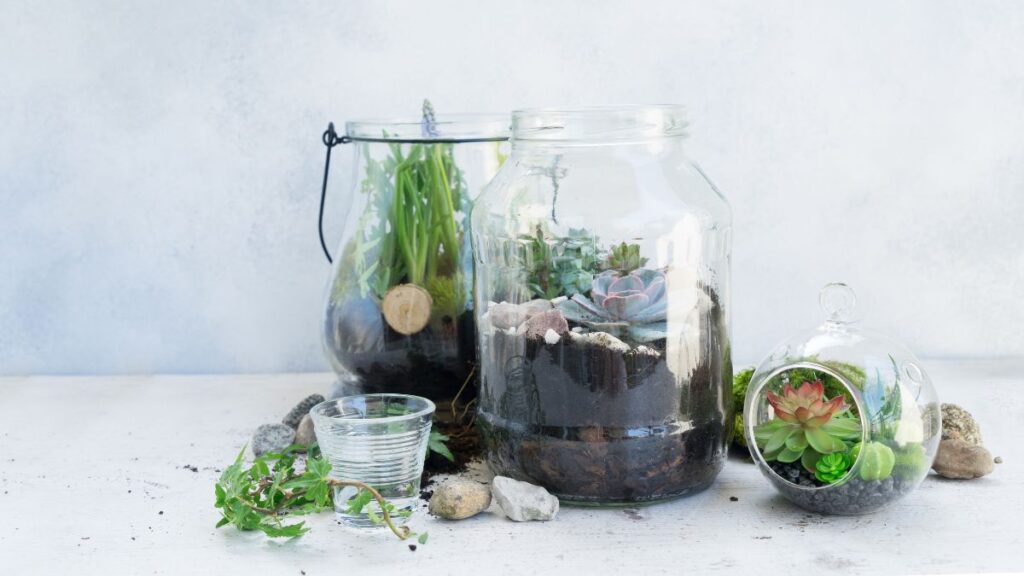
Building Terrarium Layers
Stack your substrates with intention to boost the self sustaining terrariums process. Begin with a drainage layer, usually pebbles or leca. Lay a mesh barrier above to stop soil from clogging that layer. Use a moisture-retentive, yet light soil mix for optimal root growth.
A common scenario: A beginner sets the soil too high, causing the roots to rot. Instead, keep soil levels under half the container’s height. Add a thin layer of sphagnum moss on top to suppress mold and support humidity control.
End each layer firmly before starting the next—press but don’t compact. This technique mimics forest floors, where organic layers form a buffer that supports lasting microfauna and discourages stagnant water.
| Plant Type | Light Level | Companion Example | Best Placement Tip |
|---|---|---|---|
| Mosses | Low to Medium | Selaginella | Bottom layer, under foliage |
| Tiny Ferns | Medium | Peperomia | Back/middle, indirect light |
| Miniature Vines | Medium to Bright | Creeping Fig | Side or draped for depth |
| Fittonias | Low to Medium | Moss | Clustered in corners |
| Air Plants | Bright Indirect | Lithops | On hardscape, near surface |
Correct Lighting Routines Keep Micro Ecosystems in Balance
Meet the lighting preferences for self sustaining terrariums by managing exposure and intensity. Plants signal light stress by fading, stretching, or dropping leaves, so watch for cues as you adjust routines.
Place your terrarium where it gets indirect, bright light but avoids harsh midday sun, which scorches leaves and dries soil too fast. Rotate containers weekly so plants grow upright and get even light distribution.
Checking Light Quality
Hold your hand above the terrarium at midday. If it casts a sharp shadow, move the container back from the window. Diffuse direct rays with sheer curtains. For dimmer rooms, supplement with a full-spectrum LED during daylight hours. Set a timer for 8–10 hours to mimic natural cycles.
- Move the terrarium two feet away from direct window light to reduce heat and evaporation immediately.
- Install a desk lamp with a grow bulb if your region experiences extended cloudy weeks.
- Track growth—leggy stems means low light; crispy leaf edges signal too much direct sun.
- Test with a light meter if you want precision targeting between 500 and 1000 lux for most tropical microplants.
- Rotate the container every few days so all plant sides develop evenly, keeping internal microfauna stable.
Balanced light maintains energy for plant growth but avoids stressing the closed system. Consistency develops a predictable self sustaining terrariums rhythm for both plants and microfauna.
Synchronizing Light and Moisture
Light and humidity go hand-in-hand in terrarium care. As you increase light, evaporation rises, which changes the moisture cycle inside. Check soil daily for the first week after any lighting change.
- Group terrariums based on plant humidity needs so you can tweak lighting and misting schedules without mixing dry and moist zones.
- Increase misting slightly if temperatures rise, but always ventilate after misting to deter fungal growth and rot.
- Dust glass panels weekly to keep maximum light transmission—clean, streak-free glass ensures photosynthesis inside the container is never interrupted.
- Switch off lights at night to mimic diurnal cycles. Overnight cooling helps mosses and ferns recover from daytime photosynthetic activity.
- Jot down changes—a quick notebook log lets you track what works so you can repeat successes each season.
Attending to these details makes your micro terrarium more resilient and less prone to mold, algae, and stunted growth. Reliable light cycles build plant and microfauna health across months, not just days.
Watering and Ventilation Strategies for Resilient Micro Terrariums
Mastering the water-air equation in self sustaining terrariums is key to long life. Closed systems recycle moisture, while open designs lose water faster, so adjust your approach accordingly.
Always water with a gentle squeeze bottle or syringe near the soil line, never onto foliage. This keeps the leaves dry, deterring fungal outbreaks. Target just enough moisture to reach the root zone—test by inserting a wood skewer and checking for dampness.
Moisture Meter Alternatives
Skip fancy tools. Press a finger against the glass just above the substrate. If it fogs up and feels cool, there’s enough moisture. If it stays dry, add a few drops only, then let air circulate an hour before closing.
Picture this: You misted too much, and condensation forms quickly. Tilt the jar lid open slightly for half an hour to release excess vapor. This simple routine prevents swampy, anaerobic conditions and keeps roots healthy.
Overwatering is tempting, but in closed micro terrariums, it’s a leading cause of mold. Err on the dry side, especially in cooler seasons, and use a spray more than a pour for fine control.
Smart Ventilation Habits
Allow for short, regular air exchanges in closed systems every seven to ten days. Pop the lid open for five minutes, preferably on a dry morning. This refreshes oxygen in the micro-environment and lowers risk of fungal spores taking hold.
If you spot persistent fogging, lengthen venting times. Listen for the light pop of lids resealing—this means pressures have equalized. For open designs, monitor humidity loss but avoid placing near heaters or air vents, as these cause wild fluctuations.
Use a paper or mesh screen on top of open terrariums to buffer dust and bugs, and keep the ecosystem breathable while slowing down water loss. These minor tweaks keep your micro system’s cycles stable over months.
Proactive Pest, Fungal, and Mold Management Maintains Health
Even in closed glass habitats, self sustaining terrariums face pest and fungus threats. Proactive, gentle management ensures long-lived, healthy micro ecosystems without chemical sprays.
Introduce only clean, quarantined plants. Rinse roots and foliage gently under lukewarm water. Isolate newcomers for two weeks in a separate jar. Watch for soil gnats and examine leaf undersides by holding the plant near a bright light; pests hide there first.
Power of Microfauna Partners
Anchor your terrarium’s health with microfauna: springtails and isopods consume mold, fungus, and leftover plant matter naturally. Add a pinch of springtails to damp sphagnum near the base layer. Soon, you’ll see fewer mold patches and cleaner leaves for longer.
Incorporate isopods if your container is big enough—look for dwarf species, and only introduce half a dozen per liter of volume. Microfauna populations self-stabilize, keeping your self sustaining terrarium tidy and balanced. Monitor with a magnifier if you want to count their progress.
If you spot rapid mold blooms, avoid scraping with sharp tools—this injures plants. Instead, use a paper towel to blot affected spots, then increase airflow until growth slows. Prevention outperforms cure every time in these small-scale ecosystems.
Fungal Signs and Cleanup Sequences
Recognize fungus: white fuzz at soil edges, yellow slimes, or spotty leaf patches. Isolate affected plants as soon as you see symptoms. Gently remove visible fungus with a sterile cotton swab.
If outbreak recurs, reduce mist frequency and add another springtail batch. Brighten the container’s light source slightly—fungus thrives in consistently dark, wet areas. A four-day stretch of indirect sunlight helps restore balance in most low-level outbreaks.
Keep tools like tweezers and cotton tips nearby for ongoing patrol. Regular, hands-on observation gives early warnings, so you act before issues become entrenched. This maintains peace in your closed world.
| Pest/Fungal Type | First Visual Sign | Microfauna Solution | Best Next Step |
|---|---|---|---|
| Fungus Gnats | Fly specks on glass | More springtails | Open lid, reduce water |
| White Mold | Cottony patches | Isopod addition | Blot with paper towel |
| Scale Insects | Sticky leaves | None (remove manually) | Careful hand removal |
| Slime Mold | Yellow trails | Springtails/isopods | Increase light |
| Rot | Soggy, blackened roots | None (trim/replace plant) | Cut away, dry out soil |
Optimizing Substrate Composition and Soil Refresh Schedules
Well-chosen substrates are the foundation of self sustaining terrariums. Soil richness, drainage, and buffer layers dictate moisture cycles and minimize pest buildup. Refresh timing is about observation, not just the calendar.
Mix coco coir, perlite, and sphagnum for main soil. Add a layer of activated charcoal below to trap odors and filter any stagnant water. Rule of thumb: Lighter mixes air roots for years without compaction, while heavy soils collapse and suffocate mosses and ferns more quickly.
Recognizing Soil Fatigue
A tired substrate gives clear signs: slow growth, gray or brown moss patches, hard-packed soil, or sour smells from below the mulch. Probe lightly to check depth. If the tool sticks, the mix needs loosening or replacing that week.
To replace substrate, gently lift out plants, rock the root ball loose, and scoop with a plastic spoon. Always keep roots moist with a light mist until you repot in the new blend. Replant at the same height for continuity.
Add a pinch of new sphagnum on top for immediate humidity. Shake loose old dirt but don’t rinse roots clean; a bit of ‘living’ soil carries over established microbes for a softer transition. Top up drainage pebbles only if you notice pooling water after replanting.
Seasonal Tweaks for Steady Year-Round Micro Terrarium Success
Your self sustaining terrariums respond to ambient seasonal changes. Adjust routines across summer and winter cycles to keep your ecosystem steady, regardless of what’s happening outside your window.
During summer, keep terrariums away from direct sun. Mist early in the day so foliage dries before nighttime. Hot spells accelerate evaporation—add a few drops of water weekly and increase airflow, but never leave lids open overnight due to pests.
Winter Dormancy Adjustments
Certain plants slow down in sheltered winter conditions. Reduce misting, halt fertilizing, and trim away any dying foliage to prevent rot. Position your terrarium on stable surfaces, away from drafty sills or heating units.
If condensation builds on all sides, open the lid slightly for extra venting. Plants need rest periods—think of this as letting your system “sleep.” Check weekly for any pest migration or new fungal spots, which appear in stagnant cold.
Dust lids and glass during winter so light stays even. Damp cloths work best; avoid strong glass cleaners that might upset the microclimate. After each clean, take a minute to spot-check for hidden signs of stress or growth.
Reflecting on the Value of Patience and Observation in Terrarium Care
Caring for self sustaining terrariums teaches the art of patience. Every watering, trim, and microfauna release should be watched and learned from. Actively observing these cycles leads to years of consistent, resilient ecosystems on your shelf or desk.
Recognizing small changes makes a big impact—a dusting of mold, a sudden growth spurt, or a subtle shift in condensation routines tells you exactly what your terrarium needs. No rushed schedules—just steady, hands-on interaction brings progress.
Let the process be as rewarding as the result. Enjoy the ongoing dialogue between plants and your care. Becoming a micro ecosystem steward means each new leaf, root, or colony is a small success in your personalized world.
Frequently Asked Questions
Is every type of plant suitable for self sustaining terrariums?
Not every plant thrives in self sustaining terrariums. Choose smaller, slow-growing species like moss, ferns, and mini vines. Avoid fast growers or large-leafed varieties, which quickly outcompete others or block light within the container.
How do I know if my micro terrarium needs more water?
Foggy glass and damp, spongy soil are strong signs you don’t need to water. For self sustaining terrariums, let the top layer dry slightly before adding small amounts with a spray bottle instead of pouring.
Can I skip fertilizing micro terrarium ecosystems?
For self sustaining terrariums, it’s best to use a very mild, diluted fertilizer a few times a year unless your plants show consistent pale leaves. Over-fertilizing disturbs the microclimate and boosts pest and algae growth.
How can pests or mold appear inside closed containers?
New plants or unsterilized soils can bring in pests or spores. Self sustaining terrariums benefit from regular monitoring; use springtails and isopods for natural pest control and open the container briefly for regular air exchanges.
Why does my terrarium’s moss turn brown over time?
Brown moss suggests dry air, excessive light, or old soil. Adjust light exposure, mist the moss, or refresh the substrate layer. Self sustaining terrariums thrive when you replicate shaded, humid, and nutrient-rich natural habitats.