Few things draw the eye quite like a vibrant micro terrarium ecosystem. The right vessel brings your vision to life, showcasing every moss patch and pebble. Some terrarium containers turn simple moss and stones into a world you can hold in your hands, bringing creativity front and center.
Understanding which terrarium containers best suit your ideas helps create thriving micro-ecosystems. Each container’s shape, material, and features can support—or limit—the growth and health of your mini landscape. Choosing wisely saves time and frustration as you experiment with plant placement and maintenance.
Read on for practical steps, clear comparisons, and actionable tips—everything you need for choosing and customizing terrarium containers in micro terrarium ecosystems. By the end, you’ll feel confident setting up your own thriving glass oasis at home.
Find Your Fit: Container Types for Different Micro Ecosystem Goals
Starting your first micro terrarium requires a container matched to your project’s size, light, and upkeep needs. Glass, acrylic, and specialized plastics each offer distinct advantages for terrarium containers. Consider what fits on your shelf or desk before committing.
Transparent terrarium containers let you monitor moisture and plant health at a glance. If growing humidity-loving mosses or ferns, a snug lid helps seal in moisture. For succulents or cacti, go with wider openings to prevent excess humidity and mold.
Balancing Light and Shape for Success
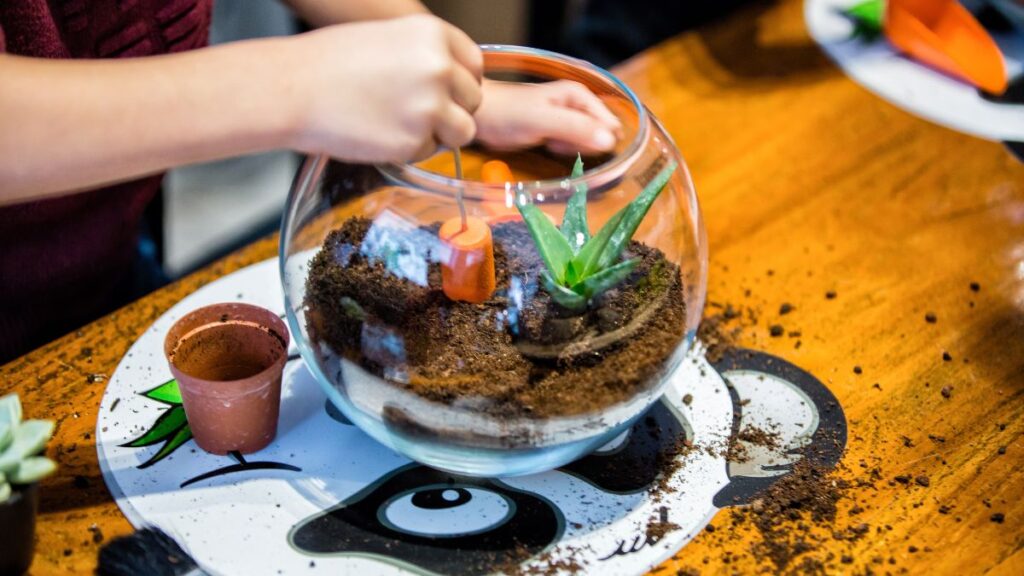
Square, round, or even polygonal shapes shape how light enters your terrarium containers. Imagine sunlight hitting a fishbowl: the curved surface diffuses rays, providing gentle, indirect lighting ideal for mosses and miniature ferns. This creates a soft, dappled effect inside the ecosystem.
In contrast, straight-sided cube terrarium containers give more direct sun to plants on the edges—great for succulents and less dense plantings. Before choosing a container, sketch your plant arrangement and consider which shapes work best for your intended micro-ecosystem.
If unsure, start with a classic cylinder jar. Easy to find and inexpensive, cylinders suit most beginner plant combinations and give you flexibility in future redesigns or plant swaps.
Real-Life Example: Choosing the Right Size
Anna wanted a micro terrarium for her office. She picked a 3-inch glass cube for her windowsill—just enough space for a single fern and stone accents. She could watch condensation patterns and easily lift the lid to make adjustments.
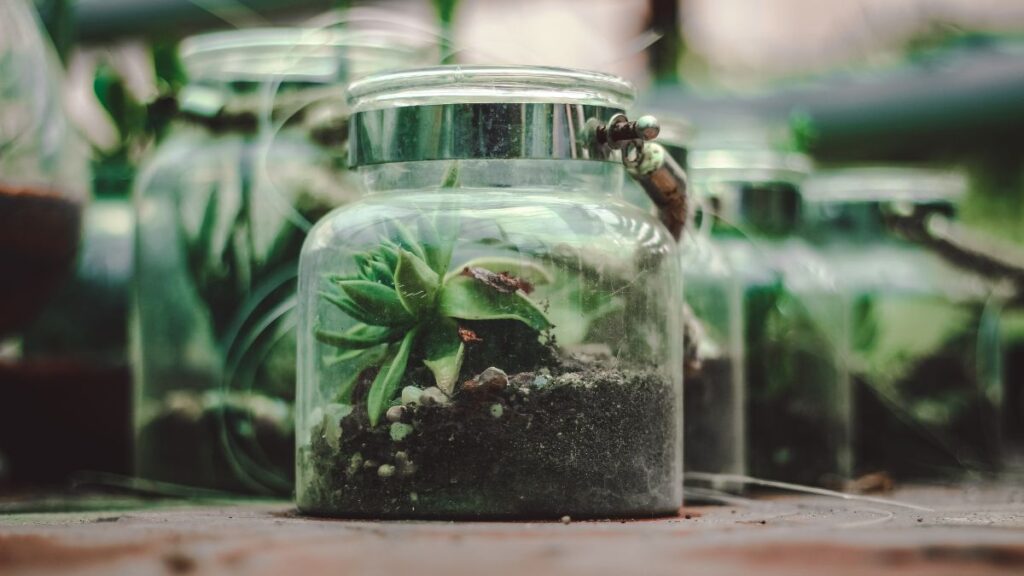
Meanwhile, Marcus chose a large pickle jar for his desk centerpiece. He focused on layering substrates for better drainage but discovered his setup ran humid. He now leaves the lid ajar one day a week to air out, preventing mold growth.
Matching terrarium containers’ shape and size to your schedule and plant needs makes maintenance much easier—and more rewarding—regardless of your starting skill level.
| Container Type | Best For | Key Drawback | What to Try Next |
|---|---|---|---|
| Glass Jar (Cylinder) | Beginner-friendly, humid environments | Limited airflow (risk of mold) | Prop the lid open or use small vents for air |
| Fish Bowl | Visual access, moss & fern displays | Irrigation may pool at bottom | Add layered gravel for adequate drainage |
| Cube Vase | Compact cacti/succulent gardens | Less humidity retention | Mist plants occasionally for moisture |
| Acrylic Orb | Children’s projects, safe alternatives | Can scratch, less UV protection | Minimize direct sun to preserve clarity |
| Cloche Dome | Showcase rare, delicate plants | Difficult access for pruning | Rotate the dome weekly for balanced growth |
Useful Features: What to Look For in Terrarium Containers
Picking containers with the right features gives your micro terrarium ecosystem its best start. Look for clarity, a stable base, and material durability during your search—these elements combine to boost plant health and longevity.
Avoid containers with narrow necks when possible. These limit your ability to arrange substrate layers, plant specimens, or tend to the ecosystem inside. Wider mouths allow easier maintenance throughout your terrarium’s lifecycle.
Checklist: Five Features That Make a Difference
- Choose crystal-clear terrarium containers so you can monitor roots, moss, and soil moisture. This helps spot issues like fungus or rot quickly and adjust care routines as needed.
- Prefer containers with sturdy, flat bases. A stable foundation prevents your micro terrarium from toppling, especially in high-traffic spaces like offices or on windowsills.
- Prioritize jars and vases with wide openings. Wider access makes it simple to layer substrates correctly, reposition plants, or remove debris, maintaining balance and healthy airflow.
- Seek lids or covers with optional vents. Controllable ventilation improves humidity management and protects against mold. Use a stick or wedge on jar lids if specific vents aren’t available.
- Consider containers made of high-quality glass or scratch-resistant acrylic. They last longer, withstand regular cleaning, and maintain visibility for longer periods without clouding.
When prepping terrarium containers, double-check that all surfaces are clean of residue. Use mild soap, rinse well, and air-dry fully before adding substrate to prevent contaminant introduction.
Key Don’ts: Avoiding Frustration in Your Container Hunt
- Don’t pick containers with colored glass; tinted sides block vital light for micro terrarium plants. Stick to clear glass or transparent acrylic for optimal growth results.
- Skip jars with permanently narrow necks unless building single-stem habitats. These restrict the creative arrangement of stones, moss, or decorative accents inside your ecosystem.
- Don’t use vintage jars with cracks or stains for your first terrarium containers. Micro-organisms thrive in these imperfections and harm your plants or destroy years of collected moss.
- Skip heavy, thick-walled vases if lifting or moving is needed. These are cumbersome and increase the risk of drops or damage when adjusting the placement of your terrarium.
- Don’t select containers with glued-on parts or decorative metal, which can corrode from water exposure and leach substances that destabilize your micro terrarium ecosystem.
Following these practical container rules will streamline your creative process and reduce the risk of future problems for your terrarium containers and the ecosystems they support.
Practical Steps for Customizing Your Container
Tailoring basic terrarium containers into works of living art is both rewarding and practical. Customizing your jar, fishbowl, or vase allows you to control airflow, humidity, and the visual style of your micro terrarium setup.
Add a drainage layer of gravel or small stones to the bottom of terrarium containers. This technique mimics natural earth layers, curbing excess water and helping roots avoid rot even in closed environments.
Adding Airflow: Practical Lid Modifications
For micro terrariums in canning jars or glass domes, poke tiny holes in the lid or use a mesh screen insert. This allows fresh air to reach your plants without dramatically lowering humidity levels in terrarium containers.
If using plastic or acrylic lids, cut a quarter-sized hole near the rim and cover with fine mesh. Fasten mesh with food-safe glue or tape, allowing regular misting through the gap. Secure any modifications to keep the environment consistent.
Rotate the lid or screen every week, observing how humidity changes. Detailed observation and small tweaks help build experience as you adapt terrarium containers to different plant varieties.
Decor and Landscape Elements: A Step Further
Anchor stones or driftwood at the far edge of your micro terrarium to create unexpected slopes. Leaning items at angles, like a playground seesaw, enables new planting levels and changes how light falls inside terrarium containers.
Attach mini climbing branches or mossy twigs to the interior, using small suction cups or fishing line. This enhances vertical space, making use of the entire container height for a multi-layered effect. Check every angle for balance and accessibility.
Finish off your micro ecosystem by arranging polished pebbles around the soil surface. Think of this as setting a border on a miniature garden, keeping things neat and visually appealing within terrarium containers.
Caring for Micro Terrarium Ecosystems Over Time
Learn to adjust your care routine based on the traits of your chosen terrarium containers. Micro terrariums require attentive monitoring, especially in sealed jars or cloches, where the environment can shift rapidly in response to ambient light and temperature.
If you notice excessive condensation, prop the lid open slightly using a folded piece of paper. This allows excess moisture to escape without disrupting plant roots. Monitor patterns of condensation on terrarium containers’ walls as signals for when to air out or reseal.
Routine Upkeep Script
Every week, shine a flashlight along the sides of the container to spot hidden mold or dying leaves. Use long tweezers to reach in and gently remove any dying material before it decays. This prevents rot and keeps your terrarium containers clear and odor-free.
If fungal spots appear on moss or soil, sprinkle a bit of ground cinnamon near the problem area (avoiding plant leaves). Cinnamon helps suppress fungal growth in micro terrarium containers, giving you time to fix ventilation or reduce watering without chemicals.
Set reminders to rotate terrarium containers every two weeks. This evens out plant exposure, preventing one-sided growth and helping your ecosystem fill the available space evenly. Make sure each plant has room to thrive in your container’s unique shape.
Long-Term Adjustments: Troubleshooting Scenarios
Suppose your moss turns yellow, but the soil seems wet. Cut back on misting and add a small pinch of activated charcoal to the substrate—this improves drainage and odor control inside terrarium containers.
If you spot rapid root growth crowding sides, gently repot sections into a second container. This maintains a stable balance in each micro ecosystem, letting your original terrarium containers remain healthy and attractive for longer.
When algae coats the inside walls, wipe clean with damp paper and reassemble. Consider if the container gets direct sun—moving it to a shadier location in your home can halt future algae buildup permanently.
Personalizing Your Display: Terrarium Containers as Decor
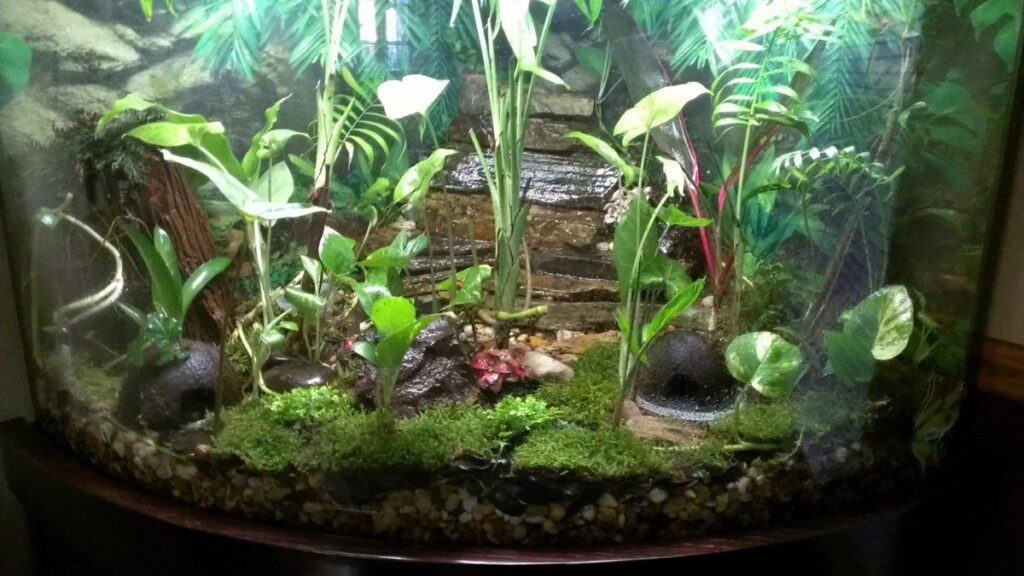
See terrarium containers as both functional environments and conversation pieces. Arrange miniature scenes inside—themed around forests, mountains, or streams—to transform each micro terrarium into a tiny world styled to your taste.
Grouping multiple terrarium containers by height and shape adds depth to your display. Place taller jars behind smaller spheres to mimic natural landscapes, drawing the viewer’s eye through your collection.
Theme Ideas for Micro Terrarium Displays
Craft a mossy woodland using a cloche dome for vertical height and a cube for the forest floor. Use fine aquascaping sand as a stream or trail winding between the jars, making your workspace or living room a nature-inspired setting.
For a modern look, use clear acrylic orbs as single-specimen showcases—perfect for rare ferns or the veined leaves of jewel orchids. Set against a white background, these containers highlight the vibrant greens and geometric plant forms within.
Pendant micro terrariums let you turn desk lamps, wall hooks, or even window frames into living art pieces. Use lightweight plastic terrarium containers, attaching them securely and checking weekly to ensure they stay in place and plants get indirect light.
Terrarium Containers for Small Spaces
Tight on shelf room? Opt for stacking jars or magnetic containers that cling to metal surfaces. Arrange them in staggered clusters for easy reach, letting even apartment dwellers grow a range of micro ecosystems with minimal footprint.
Short, round jars suit windowsills, where they receive filtered sun but aren’t at risk from drafts. Choose wide containers when growing sprawling mosses or horizontal ground cover, letting the mini landscape develop a seamless, natural look.
In shared living or workspaces, favor shatterproof containers that withstand bumps or accidental drops. Prioritize plant selections that tolerate variable light—hardy ferns, mosses, or air plants suit these environments, keeping your personal micro terrarium ecosystem reliably green.
Frequently Asked Questions
What’s the best container for a beginner terrarium project?
Choose a clear glass cylinder jar with a wide mouth. This lets you easily add substrate layers, arrange plants, and maintain airflow, giving you the most flexibility as you learn micro terrarium care inside safe, sealed terrarium containers.
Can I use recycled jars or bottles for my micro terrarium?
Recycled jars work well if cleaned thoroughly and free of cracks or colored glass. Scrub with mild soap, rinse, and dry. Choose jars with wide mouths to simplify planting and future maintenance for your terrarium containers.
How do I prevent condensation from building up?
If frequent condensation appears inside your terrarium containers, prop the lid open with a small stick or wedge for a few hours daily. Monitoring and adjusting humidity by observing condensation patterns helps keep plants healthy over time.
Are plastic containers suitable for micro terrariums?
Plastic terrarium containers are lighter and safer for kids or hanging displays but may scratch or cloud with time. Use acrylic for better durability; always avoid colored or opaque plastic that blocks necessary light from reaching your terrarium ecosystem.
What’s the ideal size for micro terrarium containers?
For most beginners, start with containers between three and five inches tall and wide. These hold enough substrate and plants without being hard to maintain, letting you experiment and learn before scaling up to larger or more complex micro terrarium projects.