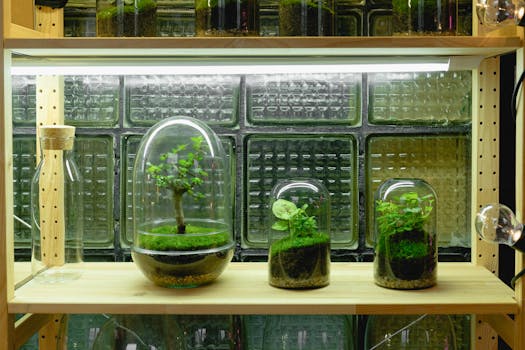
Micro terrarium ecosystems thrive when lighting is carefully planned, especially when LED lighting is incorporated in smart ways. People who enjoy creating miniature gardens appreciate simple, tailored solutions that keep plants vividly illuminated and healthy inside glass containers.
Directing natural sunlight or room lighting to such small worlds isn’t always practical. That’s when the convenience, affordability, and subtlety of custom LED lighting stands out. Proper lighting can bring out intricate plant details and encourage healthy growth inside even the smallest build.
If you want to make your terrarium more vibrant, visible, and easy to maintain, integrating LED lighting into the glass lid offers a discreet, energy-efficient fix. Let’s explore clear, practical strategies for designing and installing these lights for miniature ecosystems.
LED Lighting Design Basics for Micro Terrariums
When you embed LED lighting into a glass lid, you immediately control light direction and brightness for your terrarium plants. This design step lets you deliver targeted light and enhance the container’s display effect.
To succeed, begin with a clear design plan, accounting for the glass lid size, plant species’ lighting needs, and the effect you want. You avoid wasted work and boost plant health by thinking ahead about LED layout and power supply placement.
Determining the Right LED Brightness and Color
Getting LED lighting intensity right keeps plants from becoming leggy or scorched. For mosses and ferns, use gentle, diffused LEDs rated around 6000K, installed with a frosted shield for softer coverage.
For tropical terrarium species and flowering plants, you’ll want higher-watt LEDs, up to 8000K, positioned so leaves are illuminated from above without excessive heat.
Choosing a shallow angle for your LEDs—rather than direct vertical placement—can mimic natural sun movement and reduce harsh glare on glass.
Positioning and Spacing Techniques
Space LED strips in a U-shape around the inner rim of the lid to achieve even coverage, or alternate clusters for spot-lighting feature plants. Test placement by loosely taping LEDs before any permanent installation.
For round lids, spiral the strip around the edge to maximize exposure on all plant layers. For rectangular builds, place parallel runs for consistent light bands along the substrate.
After you choose spacing, photograph your mockup at day and night; adjust according to where shadows fall or reflections appear in the glass.
| Glass Lid Shape | LED Layout Style | Best for Plant Types | Actionable Takeaway |
|---|---|---|---|
| Circle | Spiral strip | Mosses, low canopies | Spiral design ensures 360-degree light; fit flexible strip and avoid hard angle shadows. |
| Rectangle | Parallel bands | Tropical, upright plants | Install two parallel strips for balanced light with minimum shadowing along substrate. |
| Square | Corner accents | Feature succulents, accent plants | Cluster LEDs at corners for drama and minimal heat buildup in one spot. |
| Oval | Semi-looped arc | Mixed ferns and mosses | Arc arrangement focuses light on mid-line, perfect for centralized features. |
| Hexagon | Edge tracing | Varied, layered displays | Trace entire edge with strip, blending soft and strong light for tiers or mini-trees. |
Tools, Materials, and Simple Wiring Tips for Safety
Preparing tools and materials positions you for a safe, frustration-free LED lighting project. A checklist helps you avoid last-minute runs or dangerous shortcutting.
It pays to gather everything first—glass-safe glue, silicone-coated LED strips, micro-soldering pen, shrink tubing, and insulated wire—so each step flows smoothly from setup to final connection.
Prepping Tools and Workspace
Clear a stable workbench with bright ambient lighting. Lay out your tools: wire cutters, soldering station, glue applicator, and a small clamp. Have a heat gun and shrink tubing for securing connections.
- Gather all LED lighting tools and test each item before you start to ensure nothing stalls your progress mid-project.
- Position LEDs at waist height while you work to maintain ergonomic comfort and cleaner, straighter wiring results.
- Label wire ends with colored tape—red for power, black for ground—minimizing mistakes when assembling circuits inside the lid.
- Dry fit all parts against the terrarium lid to catch sizing issues before adhesives are applied and LEDs are committed to position.
- Test flexible strips for bendability by curving them loosely around a similar glass scrap. Discard any strip that cracks or delaminates.
Setting out an orderly workspace reduces the risk of overlooking settings or tripping over tools. Safety comes from deliberate, clear steps as you build each part.
Choosing Materials for Longevity and Waterproofing
Select only waterproof, silicone-encased LED strips to contain humidity inside micro terrariums. Use food-safe silicone glue—never superglue—because it prevents toxic fumes and maintains a soft seal against shifting glass.
- Apply silicone glue in a thin, even bead along the inner glass edge, pressing the LED in with a wooden craft stick. Let cure before handling.
- When wiring connectors, always slip shrink tubing on before soldering so water can’t reach metal joints post-assembly.
- Opt for 5V or 12V LED strips compatible with USB wall adapters for a safer, low-voltage project that’s easy to power without bulky plugs.
- Choose copper or silver wires for corrosion resistance in humid environments. Avoid bare steel, which can rust and short circuits over time.
- Seal all exposed solder joints with extra dabs of silicone, smoothing flat with a spatula tip for invisible, leak-proof results.
With the right materials, your LED lighting remains bright and reliable even as condensation cycles inside the terrarium each day.
Stepwise LED Integration with Glass Lids
Step-by-step assembly ensures strong, mistake-free results with LED lighting built into a micro terrarium’s glass lid. Each action provides feedback to help you course-correct quickly if anything shifts or fails.
Clear action flows make troubleshooting easy if a connection flickers or a light doesn’t turn on. When you work with intention, you get reliable, repeatable lighting effects tailored to every plant’s placement.
Real-World Assembly Sequence for Beginners
Start with a cleaned and dry glass lid. Attach cut-to-fit, flexible LED strips with a thin silicone bead, applying gentle, even pressure for full adhesion along the curve.
Solder pre-tinned wires to the strip’s ends if cutting. Slide on shrink tubing first, solder fast with a pointed tip, then shrink the tubing in place over joints with a heat gun or lighter.
Position the lid onto the terrarium and connect wires to a hidden battery box or low-profile USB adapter. Lay plants, close the lid, and test lighting at day and night to catch shadow changes instantly.
Finishing Steps and Clean Wiring
Tuck or glue loose wires along the lid’s edge or into a groove cut in the lid rim. This makes maintenance safer and keeps plants out of harm’s way.
Test for hot spots by holding a hand to the glass lid after 30 minutes: if it’s warm but not hot, the LED strip setup is safe for long-term use.
For upgrades, add a soft dimmer switch outside the lid, allowing on-the-fly brightness changes as your terrarium environment evolves or if plants outgrow their initial needs.
Advanced Options and Custom Features for LED Lids
The most memorable micro terrarium ecosystems come alive with custom LED lighting touches—set timers, gradual fade-in, or themed colors to match plants or decor. Personalization enhances both display and plant health.
Using smart controllers brings mood lighting and gentle wake/sleep cycles, mimicking sunrise or dusk. You increase your terrarium’s aesthetic appeal and replicate nature’s rhythms with very little extra work.
Programming Custom Lighting Scenarios
Program a wireless relay module for on-off control using your phone. Example: Set LEDs to self-dim at midnight and brighten again each morning, supporting both plant and pet sleep/wake patterns.
Add gentle blue or red LEDs for moss propagation or flowering plants, switching color temperature using a simple three-button inline controller.
Automatic microcontrollers (like an Arduino Nano) let you set light cycles with code, so plants get an exact balance of light/dark, every single day—no forgetting or manual switching needed.
Adding Decorative Diffusers and Accents
Fit a frosted plastic or textured glass panel between LEDs and terrarium interior to diffuse harshness and soften the look. For artistic builds, press glass etching decals in place to create leaf or vine silhouettes glowing from within the lid.
Mimic forest dappling by masking sections of LED strips with dark tape, creating scattered light beams for ferns and mosses that prefer shade patches.
Apply micro dots of glass paint over the LED casing to tint beams subtly, echoing sunrise gold or emerald to set the mood for different plant displays or create a fantastical micro-landscape.
Maintaining Your LED-Enhanced Terrarium Ecosystem
A regular routine for checking and caring for your LED lighting keeps your micro terrarium ecosystem thriving. Stable lighting reduces stress on plants and prevents technical headaches over time.
Simple reminders and observation steps prevent common pitfalls like plant bleaching, glass fogging, or accidental water contact with live electrical connections in the lid.
Routine Inspection and Cleaning Schedule
Wipe glass lids weekly with a lint-free cloth, checking for condensation buildup and dust on LEDs. Unplug lights before cleaning—never spray water directly near sealed strips or wires.
If you spot a dark patch, peek beneath LED housing for corrosion or loose wires. Tighten with tweezers and reseal with non-toxic silicone if needed, addressing issues before lights dim.
Replace battery packs every 6–12 months, or sooner for high-use, timer-driven LED lighting setups. Stick a post-it reminder inside your gardening kit to stay on top of changes.
Evaluating Plant Responses and Adjusting Settings
Monitor plant color and orientation. If stems lean toward a dark corner, adjust LED angle or brightness for a more uniform canopy. Adjust dimmer to avoid burning tips on shade-loving mosses.
For glass fogging, lower humidity or run lights in intervals to reduce internal heat. Record changes with a quick phone snapshot and track how plants respond after tweaks.
If mold appears near LED housing, confirm your seals are tight—remove and clean affected areas to prevent spread inside your micro terrarium ecosystem.
Troubleshooting Common Lighting Integration Issues
Even with careful prep, you may run into flickering LEDs, moisture creep, or uneven plant growth. A quick troubleshooting protocol ensures your micro terrarium ecosystem stays balanced and visually striking.
Solve issues by diagnosing step by step—checking hardware, electrical connections, and plant placement. Each test reveals specific fixes that restore brilliance and health to your custom build.
Quick Fixes for Flickering or Dead Lights
Check plug and USB power source for secure fit. Wiggle wire gently at the connection point; if flicker stops, resolder joint and re-cover with shrink tubing.
For dead strips, test continuity across the LED terminals with a multimeter. Replace faulty sections with extra strip, making certain polarities match before soldering in place.
If condensation gets into housing, dry strip overnight and reseal with fresh silicone. Leave terrarium lid open for a full day to clear internal humidity before switching on again.
Resolving Plant and Light Placement Conflicts
Rearrange plants if upper canopies block light from trickling to moss or low-lying species. Try moving larger plants closer to the lid’s center; shift smaller ones to the sides.
If glare appears on the glass, angle LEDs slightly away from front-facing surfaces. Light the substrate rather than the container wall to cut unwanted reflections for photos.
For stubbornly dim corners, wedge a small reflective shield—aluminum foil works—inside the lid rim to bounce extra light to shaded spots until growth evens out.
Wrapping Up: Bringing Out Nature’s Details with LED Lids
Taking time to customize LED lighting inside a glass lid reveals every detail of your micro terrarium ecosystem, day or night. Each decision, from light color and angle to diffusing, changes the mood and health of your miniature world.
Smart lighting cements your terrarium as a living art piece and reduces stress for shade dwellers and tropical species alike. Reliability grows from careful waterproofing, tailored installation, and regular inspection of hardware and plant responses.
Let LED lighting become your secret ingredient for micro terrarium success. Blend science, craft, and a bit of patience to enjoy glowing, healthy plants in a glass-topped habitat you can proudly display to friends and family.
Frequently Asked Questions
What is the best LED lighting color temperature for micro terrarium ecosystems?
Stick with cool white LEDs around 6000K for mosses and most foliage plants. Warmer color temperatures may encourage compact growth but might dim moss color vibrancy.
How do I prevent moisture from damaging LED strips inside glass lids?
Encapsulate LED wiring and joints using waterproof silicone, and choose strips with a full silicone sleeve. This prevents condensation from seeping in over time and hurting electronics.
Can LED lighting be used safely on battery power in a small terrarium?
Use 5V or 12V LED strips powered by modern USB or battery packs for reliable, heat-free lighting. Keep all power components outside the sealed terraium for easy maintenance and recharge.
How frequently should I clean my terrarium’s LED-lit lid?
Give the glass a gentle wipe weekly to remove dust and check for moisture marks. Always unplug lighting before cleaning, and double-check the sealant at least monthly for any signs of mold or buildup.
Is there a way to automate my LED lighting for terrarium plants?
Absolutely. Use a plug-in timer or a wireless controller to program predictable day/night cycles. Some setups can be programmed to dim or change color gradually, matching plant needs and enhancing display.