There’s something mesmerizing about the gentle trickle of water tumbling over mossy rocks—even more so when it fits in the palm of your hand. Integrating micro waterfalls into small terrariums can turn miniature landscapes into lively, self-sustaining microcosms.
Building a functional micro waterfall, especially in micro terrarium ecosystems, isn’t just for veteran hobbyists. It’s a reachable project for anyone wanting to enhance their terrarium’s sights and sounds with moving water, fresh air, and playful aquatic life.
Throughout this article, you’ll discover tangible steps, reliable product ideas, and expert tips to get your micro waterfalls bubbling effortlessly. Get ready for practical advice to create dynamic features that benefit every plant and critter inside your glass habitat.
Pump Selection for Reliable Micro Waterfall Flow
Choosing the right pump ensures that your micro waterfalls deliver steady, low-noise circulation that fits both your ecosystem’s needs and your container’s size.
Start by measuring your terrarium base and available water volume. Micro pumps designed for tabletop fountains or nano aquariums are typically compact enough to hide behind stone arrangements, yet strong enough to move water gently upward.
Size, Voltage, and Placement in a Miniature Setting
Tiny enclosures require careful component selection. A thumb-sized, 5V USB micro pump slips between rocks or substrate, connecting easily to USB power banks or wall plugs for consistent output.
Consider a model with adjustable flow rates. This lets you experiment with trickle speed, avoiding plant disturbance or overflow, and helps you fine-tune the micro waterfalls to suit mosses, ferns, or springtails.
When placing your pump, tuck it behind a hardscape feature with a small prefilter to prevent moss fragments from being drawn inside. This keeps flows clear and reduces blockage risk.
Troubleshooting Common Pump Setups
Pumps may hum, vibrate, or appear sluggish if air bubbles are trapped inside or water levels drop. Tap the housing gently to dislodge air; refill reservoirs as needed.
If flow suddenly stops, unplug and inspect for debris at intake. Use a soft brush or rinse under gentle water—never force objects through delicate mechanisms.
For persistent issues, try switching to a slightly stronger pump if your waterfall is taller than expected. Still, keep flow rates at a level where mosses sway lightly rather than flattening against hardscape.
| Pump Type | Size | Flow Rate (GPH) | Best For |
|---|---|---|---|
| USB Nano Pump | 2-3 in | 10-40 | Most micro waterfalls, easy concealment |
| Submersible Pico Pump | 1.5 in | 8-20 | Ultra-compact, small glass jars |
| Inline Micro Pump | 3 in | 20-60 | External reservoirs, custom tubing paths |
| Battery Mini Fountain Pump | 2.5 in | 12-35 | Portable builds, travel kits |
| Solar Mini Water Pump | 4 in panel | 15-40 | Eco setups near windows |
Efficient Tubing Paths for Waterfall Design
Laying out tubing in micro terrarium builds controls the arc, height, and silence of your micro waterfalls so water falls precisely where you intend.
Clear silicone tubing, cut to snug lengths, routes water up rock faces or through drilled cork branches. Keep bends gentle; sharp kinks reduce flow, and visible tubing is easier to disguise along the background.
Mini Checklist for Seamless Tubing Paths
Ensure tubing reaches from the pump intake to your designated spillway without excessive slack. Thread tube ends behind rocks and secure with waterproof adhesive dots every couple of inches.
- Route tubing behind driftwood to keep lines hidden while supporting plant growth upward and around the waterfall’s drop zone.
- Secure the upper tubing exit just above or within a notch in the hardscape to direct water’s landing spot and prevent splash outside the substrate basin.
- Keep overflow channels below the main water line to avoid spillage, especially when adding new water or adjusting pump angles in your micro waterfalls.
- Use pliers to gently crimp tubing if you need to fine-tune flow speed or temporarily restrict output during aquascaping adjustments.
- Snip tubing gradually—test through trial-fit inserts each quarter inch, rather than guessing the final length all at once, for a tidy layout.
A well-managed tubing path contributes not only to visual cleanliness but keeps the micro ecosystem running without leaks or tangled zones.
Mini Checklist for Concealing Tubing Route
Fit the tubing behind moss sheets layered on driftwood, threading it naturally through substrate pockets for an organic look and efficient disguise.
- Pin tube sections using small, clean river stones at each curve or rise to prevent movement during water addition or cleaning maintenance in micro waterfalls.
- Vent tubing ends just above water level to minimize gurgle—this technique also reduces splash, keeping humidity consistent for sensitive foliage.
- Use non-toxic, clear aquarium sealant to glue tubing beneath the main waterfall stone, leaving no visible gaps where water emerges for a natural effect.
- Trim excess tube with sharp scissors and keep edges smooth to prevent clogging and preserve the tidy appearance.
- Top exposed sections with sphagnum moss or shredded coco fiber, blending them seamlessly into the surrounding mini landscape for realism and coverage.
Thoughtful tubing layouts allow you to sculpt water movement in the tight confines of micro terrariums while maintaining naturalistic visuals as micro waterfalls flow seamlessly.
Customizing Hardscape for Waterfall Integration
Sculpting the terrain lets you anchor micro waterfalls without overwhelming the miniature scene. Layer pebbles, slate, or driftwood to shape true-to-nature spillways and catch basins.
Arrange each layer with an eye for scale, placing the largest stones at the base. Mosses or micro ferns fill the edges, softening transitions between wet and dry surfaces throughout your ecosystem.
Layer-by-Layer Rockwork that Holds Its Shape
Begin with broad, flat bottom stones to distribute water weight and stability. Set subsequent rocks with slight overlaps so water can fountain or form rivulets instead of draining rapidly.
Tuck the tubing exit beneath a shelf stone; pin it in place with gravel or non-toxic aquarium putty. Guide water along pre-trimmed moss mats for gradual descent and increased humidity.
Use the analogy of a mountain stream—each trickle needs a clear path. Realistically, keep each drop zone close enough that water never jumps dramatically or mists out, ensuring contained flow inside your micro waterfalls.
Mini Scene: Integrating Waterfall with Plant Layout
Trace the waterfall route first using dry material layout, then mark points where roots or stems will not be disturbed by recurrent water movement or pooling.
Plant choice around micro waterfalls matters. Place humidity-loving foliage near drop zones, while lithophytes sit higher, above direct moisture to avoid root rot. Watch plant leaves respond—those nearest the splash should grow lush, indicating a healthy microclimate.
Anchor mosses directly in the splash path. Their tendency to spread creates a buffer, catching errant droplets and encouraging vertical green growth as the micro waterfall matures.
Safe Electrical Setups in Glass Terrarium Enclosures
Setting up electrical elements for micro waterfalls means securing wires and power sources to keep plants, animals, and humans safe—without sacrificing tidy appearance or maintenance access.
Always use low-voltage equipment rated for aquarium or indoor fountain use. Route wires through cable glands in lids, when possible, or add water-resistant caps at entry points near substrate.
Best Practice Example: Cord Management and Mini Drip Loops
Position surge-protected USB hubs outside the glass. Leave enough slack to create a drip loop, so moisture can’t trail down and enter outlets—briefly test by misting and watching the path of droplets.
Coil excess cord behind the tank or inside a cable wrap secured with Velcro, never coiled tightly or forced beneath the terrarium base. Label pump and lighting cables to avoid confusion when making changes.
Apply weatherproof tape or silicone around cable entries, ensuring durability and waterproofing, preventing any stray drops from seeping in or out of your micro terrarium case.
Realistic Scenarios for First-Time Waterfall Creators
Every beginner faces a moment: plug the pump in, watch water spurt up and—sometimes—spray everywhere but where planned. Start with deliberate, incremental tests for more predictable results.
Set the water level lower on first runs, watching each micro waterfall’s path and spill spot as you slowly increase flow. Tweak rock arrangements to nudge errant streams back toward the basin as needed.
Scenario: Fixing Overflow and Splash
When overflow appears, angle upper stones slightly toward the center, then layer a strip of moss as a sponge to absorb excess. Wait for the waterfall’s path to stabilize before adding plants around the new waterway.
Mini river stone dams at the base can instantly halt splashes escaping; a gentle hand push tests whether runoff remains inside the glass for every cycle. Repeat adjustments until drips are confined.
If damp spots creep up glass walls, shift water return zones closer to the pump intake to cycle volume efficiently without spill. Always keep a lint-free towel nearby during setup tweaks.
Scenario: Adapting to Different Plants and Animals
Every plant and microcritter combination brings a unique challenge. Springtails and isopods thrive where water pools; those excess drops help colonies multiply, visibly cleaning substrate as they move.
Ferns will flourish in misty corners—try lifting the waterfall outlet using stacked pebbles until fern fronds reach the moistened zone. Observe leaf texture; healthy plants stand perky near micro waterfalls, while stressed ones may droop.
When keeping tiny frogs or shrimp, wrap fine mesh over the pump intake to protect inhabitants. This guards both pump and pets, preserving harmony in your lush ecosystem display.
Common Pitfalls and Troubleshooting for Micro Waterfall Builds
Early mishaps sometimes discourage new builders. Addressing these common mistakes boosts your confidence and ensures micro waterfalls stay consistent, silent, and spectacular over time.
Clogged pumps lead to overflow, while slipping tubing can reroute water unexpectedly. Routine monthly checks and clear identification labels cut troubleshooting time and maintain the function of your entire terrarium ecosystem.
Checklist: Regular Maintenance Steps
Use a timed reminder on your phone each month. Remove visible debris with tweezers, then perform a full water change using conditioned or filtered water to support plant and microbial health in your micro waterfalls.
- Check pump intake and prefilter sponge for clogs, cleaning with a gentle toothbrush to restore flow and reduce wear.
- Inspect tube attachment points. If slipping is noticed, reinforce with another spot of aquarium sealant or firm push of gravel.
- Test backup water volume with a quick pour, confirming the basin never runs dry or submerges sensitive plant roots during regular runs.
- Calibrate flow rates using the external dial or in-line restrictor. Lower during dry winter periods, increase slightly when summer humidity rises inside.
- Mark the ideal water level on the glass with a wax pencil for fast reference at weekly checks.
This step-by-step care approach keeps both components and living organisms thriving, maximizing the effect and beauty of micro waterfalls for months on end.
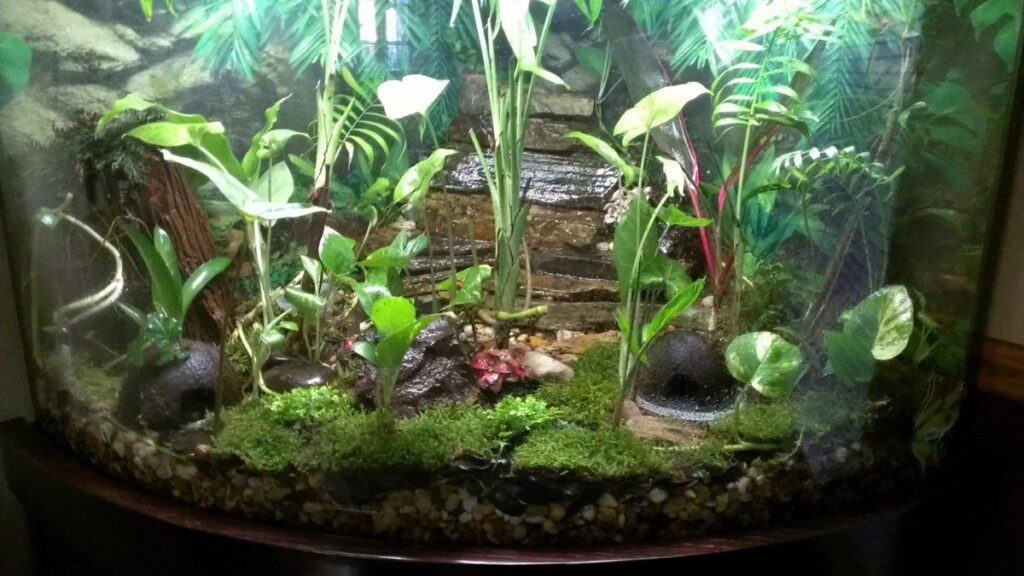
Cultivating Dynamic Micro Habitats with Waterfalls
Micro waterfalls transform static terrarium displays into living, breathing habitats where movement, sound, and lush greenery combine for a multi-sensory miniature experience.
Well-placed water features elevate humidity, boost root hydration, and gently aerate both air and substrate—vital for moss growth, isopod colonies, and healthy, vibrant root systems in compact spaces.
Waterfall-driven air movement can help discourage stagnant air, keeping algae and mold at bay while encouraging beneficial microbial cycles. Notice subtle changes over time as mosses thicken and inhabit new vertical surfaces surrounding micro waterfalls.
Try pairing micro waterfalls with LED accents beneath glass lids for dramatic nighttime effects, illuminating droplets as they cascade. This not only improves plant growth but also creates a striking focal point for your living display.
Whether designing a jungle scene, fairy garden, or succulent outcrop, micro waterfalls heighten realism and serenity, making every terrarium ecosystem both healthier and more captivating to watch daily.
Frequently Asked Questions
How do I prevent water from overflowing in my micro waterfall setup?
Careful arrangement of catch basins, loose moss, and regular flow tests are vital. Adjust stones and plants so water channels stay contained, making small tweaks with every refill or maintenance session until you’re satisfied.
What’s the best way to hide tubes and pumps in a miniature terrarium?
Route clear tubing behind or under rocks and driftwood, then cover with moss or substrate. Choose pumps the size of a thumb tip for easy concealment without crowding plants or wildlife in micro waterfalls.
Are all plants and animals safe with regular micro waterfall operation?
Most humidity-loving plants and small critters like springtails or isopods benefit greatly. For micro frogs or shrimp, add fine mesh over pump intakes and monitor splash zones to avoid stress or accidental escapes from your terrarium.
How much maintenance does a micro waterfall in a terrarium require?
Monthly cleaning of pumps and tubing is recommended, using filtered water for top-offs and periodic moss reshaping. Consistent care prevents buildup and ensures both technical and biological elements stay balanced long term.
Is it necessary to use a water conditioner in my micro waterfall ecosystem?
Yes, especially if using tap water. A good conditioner removes chlorine and chloramines, protecting plants, beneficial microbes, and any small invertebrates or amphibians living within your micro waterfalls and terrarium as a whole.