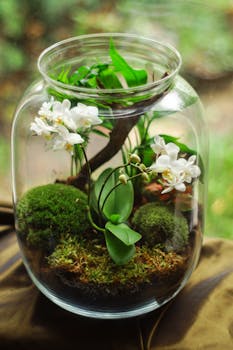
Peering into a decorative glass jar filled with lush greenery, you might spot dazzling blooms the size of a fingernail. Tucked among moss and branches, these mini orchids turn every micro terrarium ecosystem into a living work of art. Their small stature and exquisite details reward the careful observer.
Mini orchids are gaining popularity for those curating desk-sized botanical escapes. These gems are ideal for enclosed habitats, thriving where other plants outgrow their space. Caring for them invites patience, keen observation, and creativity in design.
If you’ve ever wanted to build an ecosystem that thrives on your windowsill, this guide will walk you through rare mini orchid varieties, tips for maintaining their health, and advice on showcasing them in stunning glass enclosures.
Choosing Mini Orchids for Micro Terrarium Ecosystems
Selecting the best mini orchids for a micro terrarium guarantees long-term visual interest and botanical health. Begin by identifying species that adapt naturally to high humidity and filtered light environments typical of closed jars.
Tiny epiphytes like Lepanthes, Masdevallia, and Pleurothallis work especially well in small, humid habitats. You can spot their distinct leaf shapes and petite flowers nestled against fresh moss or perched on miniature branches.
Identifying Compatible Species for Small-Scale Growing
Seek mini orchids that rarely exceed three inches in maturity. Observation helps you notice which options remain compact, such as Platystele and Sophrolaelia. In a terrarium, growth patterns should never shade neighbors or crowd the space.
Watch for orchids that tolerate stagnant air, since jar ecosystems have limited airflow. This adaptation keeps leaves lush rather than limp, making ongoing maintenance much easier for enthusiasts of all expertise levels.
Epiphytic varieties excel when mounted on cork or branches within your jar. This simulates natural tree habitats found in tropical forests, helping your mini orchids thrive for months at a time without direct soil contact.
Assessing Light, Humidity, and Temperature Ranges
Monitor light to guarantee your mini orchids receive ample but indirect sunlight. An east-facing window works best, buffered by sheer curtains if direct rays become too harsh during midday hours.
Humidity hovers between 60% and 80% in optimal jar terrariums. Use a small hygrometer if precision matters, or mist lightly every few days, watching for plump, vibrant foliage as your guide to success.
Keep temperature swings minimal; ranges from 65 to 75 degrees Fahrenheit are ideal. Fluctuations stress delicate roots and flowers, so choose a room with stable climate control for reliable mini orchid displays.
| Mini Orchid Species | Height at Maturity | Humidity Needs | Best Jar Placement |
|---|---|---|---|
| Lepanthes calodictyon | 1–2 in | High | Near moss bed |
| Masdevallia herradurae | 2–3 in | High | On cork slab |
| Pleurothallis grobyi | 1–2 in | Medium-High | Branch fork |
| Platystele compacta | Under 1 in | High | Front glass |
| Sophronitis cernua | 3 in | Medium | Sunniest spot |
Design Rules for Stunning Mini Orchid Jar Displays
Building a visually striking mini orchid jar means balancing plant placement, hardscape, and moisture control. Thoughtful arrangement elevates even the tiniest glass habitats into captivating micro terrarium ecosystems.
Plan your layers from bottom to top, establishing robust drainage first. Gravel or clay pebbles below a mesh barrier prevent stagnant water from harming orchid roots or creating rot pockets.
Arranging Moss, Branches, and Orchids for Maximum Visual Impact
Anchor a bed of vivid moss to provide humidity and color. Next, position unique branches, swiveling them to make natural arches. Finally, tuck mini orchids into crevices so their blooms peer through the greenery like rare forest discoveries.
Arrange contrasting leaf shapes for greater depth. Pair round-leafed species beside trailing or upright options to guide the viewer’s gaze throughout. Create space so no mini orchid vanishes into the foliage, letting each one shine.
Think in layers, placing smaller plants at the front and taller items at the back. This technique mimics the understory of tropical jungles, making even a wide-mouthed jar look lush and full.
- Stake branches securely to prevent shifting during watering; this stabilizes orchids and mimics tree trunks.
- Center at least one bright bloom at eye level; this draws immediate attention to intricate flower structure.
- Cluster three mini orchids together for instant visual appeal; stagger heights and angles so each one stands out.
- Place moss patches at foreground edges to frame the arrangement, creating a sense of depth in a confined space.
- Elevate trailing mini orchids above their moss bed; this highlights graceful forms while avoiding moisture buildup around roots.
Each element serves a purpose, blending beauty and practicality for an eye-catching yet sustainable enclosure. Follow these layout cues to spark compliments from anyone who peers inside your decorative jar.
Incorporating Decorative Accents Without Compromising Ecosystem Health
Choose non-toxic, inert stones or figurines if adding accents. Place decorative items away from orchid roots so water flow remains unobstructed. Too many objects crowding the base can raise humidity unevenly and disrupt air circulation.
- Limit décor to one or two pieces per jar; less is truly more in a tight enclosure where healthy airflow matters.
- Select glass beads only if sure they won’t alter water chemistry; test by soaking beforehand and discarding any beads that cloud the water.
- Use driftwood as a functional scaffold, not just for looks; space roots over wood to increase airflow to every mini orchid.
- Avoid any embellishments treated with glue or synthetics; these may leach chemicals into moist environments, harming delicate mini orchids over time.
- Choose neutral-colored accents that don’t steal focus from vivid mini orchid blooms; simplicity highlights the plants’ finest details.
Balancing aesthetic appeal with ecosystem health ensures your decorative glass jar population remains a showpiece for years to come.
Step-by-Step: Planting Your First Mini Orchid Micro Terrarium
Learning to build a micro terrarium from scratch jumpstarts your journey with mini orchids. Gathering the right tools and prepping your jar ahead of planting lays the groundwork for success. The reward is a flourishing self-contained display you’ll revisit daily.
Quicken the process with this step-by-step sequence: select a roomy glass jar, rinse thoroughly, and dry before use. Next, layer in pebbles and mesh. Finish by arranging plants and décor according to the ecosystem’s design.
Prepping the Glass Jar and Substrate Like a Pro
Clean the jar with fragrance-free soap and rinse several times to avoid chemical residues. Allow it to fully dry, preventing condensation from distorting your first layout choice. Arrange a drainage layer of clay pebbles or gravel—this prevents roots from sitting in stagnant water.
Cover the drainage layer with fine mesh or nylon stocking to separate substrate from rocks. This keeps soil particles from clogging the base. Place moistened sphagnum moss on top as a foundation, ensuring mini orchids’ roots will stay consistently damp but never submerged.
Gently tamp everything into place, ensuring a level surface for subsequent plant placement. If using bark or branch accents, insert them before adding any delicate mini orchid plants.
Strategic Placement for Every Plant
Slip each mini orchid’s roots into a shallow pocket in the moss. Tuck roots downward, never twisted sideways, to help orchids re-root and anchor quickly in the jar’s microenvironment.
Position the smallest species in front, moving progressively larger varieties deeper into the jar. This ensures every blossom is visible and sunlight penetrates to each plant equally, minimizing shading or missed watering opportunities.
Leave clear gaps around each plant’s crown so foliage dries between mists. This deters mold, keeping your micro terrarium crisp and clean as the seasons pass. Enjoy arranging, reflecting on each mini orchid’s unique beauty as you go.
Everyday Micro Terrarium Care Habits for Mini Orchid Enthusiasts
Establishing the right maintenance routine for mini orchids ensures your micro terrarium ecosystem remains vibrant and healthy. Consistent, mindful care supports flowering and prevents hidden issues in a tiny enclosed space.
Spend a few moments each morning checking leaves—and the humidity level—before your day begins. This habit reveals subtle shifts in plant health or moisture, letting you make small corrections before major problems develop.
Watering Practices: Less is More
Resist the urge to overwater. Mini orchids need moist, not soggy, substrates. Mist lightly every two to three days, watching for soft new growth as confirmation that roots are thriving.
If dew dots or drips pool on leaves, air out the jar for a few hours until surfaces dry. Excess water encourages unsightly mold, especially where airflow is limited.
Follow a script: “When leaves look slightly matte and touch cool, mist once. When leaves remain shiny or limp, air the jar out and water less.”
Monitoring for Pests and Fungal Growth
Inspect mini orchids for tell-tale dots or webbing—signs of spider mites or aphids. Catching these early prevents outbreaks. Keep a magnifying lens handy; even minor infestations can threaten your ecosystem’s balance.
If you spot mildew, gently dab the affected area with a cotton swab dipped in diluted isopropyl alcohol. Remove infected leaves immediately, sealing them in a plastic bag before disposal so spores don’t spread.
Each weekly inspection will reinforce healthy routines, helping mini orchids flourish without stress or chemical treatments in your micro terrarium.
Choosing Orchids with Unusual Forms and Colors for Unique Displays
Introducing unusual mini orchid forms or rare flower colors revives interest in compact terrariums. These visual surprises prompt closer looks and can even start conversations about the intricacies within a closed jar ecosystem.
Mini orchids with striped petals, translucent blossoms, or curly leaves create high-contrast focal points among classic moss and branches. Selecting distinctive varieties is the quickest way to transform any simple micro terrarium into an artful showpiece.
Showcasing Contrasting Textures and Shapes
Pair the glossy oval leaves of Lepanthes telipogoniflora with the trailing, fan-like forms of Masdevallia decumana. These combinations force your eye to travel between textures, echoing a miniature jungle’s diversity.
Add standout colors—red, yellow, or purple—by featuring species like Dracula lotax or Sophronitis cernua. Their blooms set off surrounding greenery, naturally guiding attention to the centerpiece at every viewing angle.
Arrange mini orchids on twisted driftwood or chunky bark to add vertical drama and structure, creating a landscape that rewards every glance into the decorative glass jar.
Building a Focal Point in a Confined Space
Select one mini orchid with an oversized flower or especially intricate structure to anchor the arrangement. Build out from this focal point, adding supporting species in complementary shades and shapes for a balanced effect.
Contrast upright, towering blossoms with trailing foliage or feathery moss for an ecosystem that feels both wild and intentional. Each deliberate pairing boosts the jar’s overall sense of movement and energy.
Update your arrangement seasonally as new rare mini orchids become available, keeping the display fresh and giving each species its fair share of the limelight.
Advanced Tips for Long-Term Micro Terrarium Success
Practicing a few advanced care techniques ensures mini orchids thrive year-round in closed glass jars. These skills make the difference between temporary beauty and a long-lasting, self-sustaining micro terrarium ecosystem.
First, commit to a schedule for pruning dying foliage and cleaning condensation. Remove yellowed leaves with sterilized scissors, and gently wipe the inside glass to prevent algae buildup.
- Rotate jars weekly to balance light exposure; this prevents miniature orchids from reaching or leaning toward only one side.
- Fertilize with a diluted orchid mix every 6–8 weeks using a sprayer, never direct pour. Target exposed roots, not leaves, for best absorption.
- Monitor root growth; repot or adjust position if any mini orchid becomes crowded or roots press against the glass repeatedly.
- Refresh moss or substrate annually, replacing the bottom inch to avoid mineral buildup that can stunt root or flower development.
- Track bloom cycles in a calendar journal. Anticipating flowering times lets you adjust light and watering for even greater success each year.
Each step maintains equilibrium within your micro terrarium, maximizing color and growth from every mini orchid chosen for the display.
Celebrating the Endless Beauty of Mini Orchids in Micro Terrariums
Mini orchids provide endless fascination in micro terrarium ecosystems, revealing new details each day. Their compact roots let you experiment with tiny landscapes, refreshing decorations as seasons shift without ever overwhelming your jar’s balance.
Watching rare mini orchids flourish in a decorative glass jar brings a sense of accomplishment. These plants reward patient, attentive handiwork with vibrant blooms and living color, brightening even the smallest windowsills and office corners year-round.
Let your micro terrarium evolve as you discover more mini orchid species. The journey never truly ends—there’s always a new arrangement to try, a different bloom to cultivate, or another combination waiting to surprise and delight.
Frequently Asked Questions
What are the easiest mini orchids to grow in a decorative glass jar?
Lepanthes and Masdevallia are excellent for beginners in micro terrariums. These varieties need consistently high humidity and filtered light. Their roots adapt quickly to moss or bark, making setup straightforward for anyone starting out.
How often should I water mini orchids in a micro terrarium?
Watering every two to three days is typical, but always check visually and by touch first. If moss appears dry and leaves matte, mist lightly; if the substrate is moist and leaves are glossy, wait another day.
Do mini orchids need fertilizer in closed jar ecosystems?
Orchids benefit from diluted fertilizer sprayed every six to eight weeks. Use only a faint solution, targeting roots directly, and avoid getting fertilizer on glass, as residues can encourage algae growth in enclosed jars.
How do I prevent mold in my mini orchid jar?
Good airflow and minimal overwatering are crucial. Leave the lid ajar occasionally, and wipe down condensation. Remove any yellowed leaves immediately and switch to a sterile spray bottle for all watering or misting routines.
Can I mix different species of mini orchids in the same jar?
Yes, but choose varieties with close humidity and light needs. Give each mini orchid ample space for root and leaf growth. Staggering bloom times and flower colors will keep your terrarium lively across every season without competition for critical resources.